|
|
Post by rnagle on Jan 27, 2013 15:33:37 GMT -8
Couldn't get a close up (just finished painting frame  ), these are closer views taken from photos posted previously. Used 1/64 x 3/32 strip from K&S Special Shapes, one piece bent to fit around items bolted to frame rail, other mitre cut at both ends as brace. 2 holes drilled and .032 brass wire used to both simulate fasteners and pin bracket to frame rail. I need to get the soldering tools out more, it's nice working with brass for a change of pace and for some applications a lot more durable than styrene. 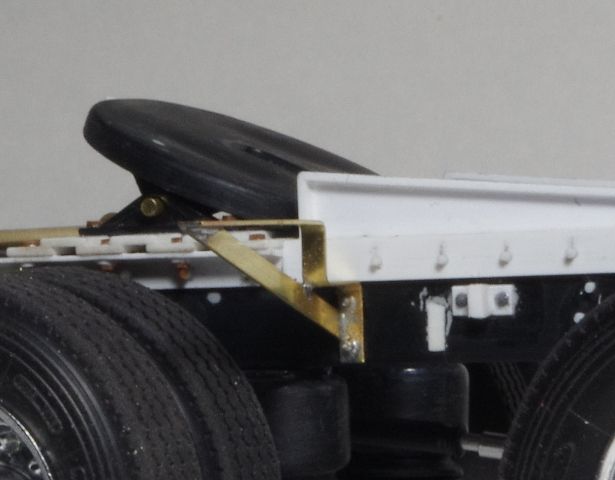 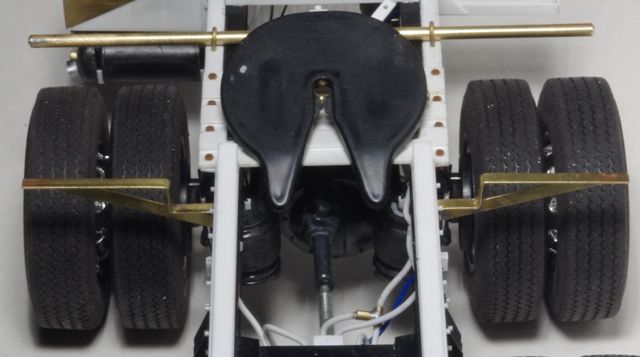 |
|
|
|
Post by rnagle on Jan 27, 2013 16:34:18 GMT -8
I really did paint it! Now, set aside and "no touch" rule for the week - lots of other things to work on as paint cures. 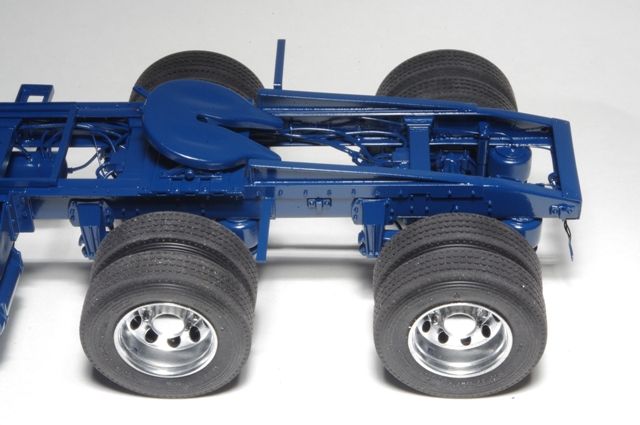 |
|
|
|
Post by ap40rocktruck on Jan 27, 2013 16:42:55 GMT -8
nice brass work Rob!
Did you use a soldiering iron, flame or resistance? I have used all 3 for various applications, & each has it own strengths.
Ap40
|
|
|
|
Post by rnagle on Jan 27, 2013 16:57:07 GMT -8
Soldering iron, the little pencil one for these parts (Weller 25 watt), I do have a 100/140 watt gun however no torch or resistance equipment. Considering buying a micro torch in the near future, resistance soldering may wait a little longer as it is a larger investment up front.
|
|
|
|
Post by ap40rocktruck on Jan 27, 2013 18:45:05 GMT -8
i highly recommend the micro torch.
Ap40
|
|
|
|
Post by gator on Jan 27, 2013 19:29:06 GMT -8
Robert,
Very nice work. I like your use of brass for strength! I need to look into that for some of my projects.
The chassis looks real nice painted.
Be Well
Gator
|
|
|
|
Post by slurrydog on Jan 27, 2013 21:10:15 GMT -8
Looks really good Robert. You are doing some very nice work.
Dave
|
|
|
|
Post by trailking120 on Jan 28, 2013 10:59:54 GMT -8
Great Work Robert   |
|
|
|
Post by rnagle on Jan 28, 2013 18:06:03 GMT -8
Thanks guys! Still primarily a plastic model although metal content went up a tiny bit - strips .040 wide cut from .003 shim brass & soldered in place, left extra long for now as it is easier to trim to proper length once bent around square bar. 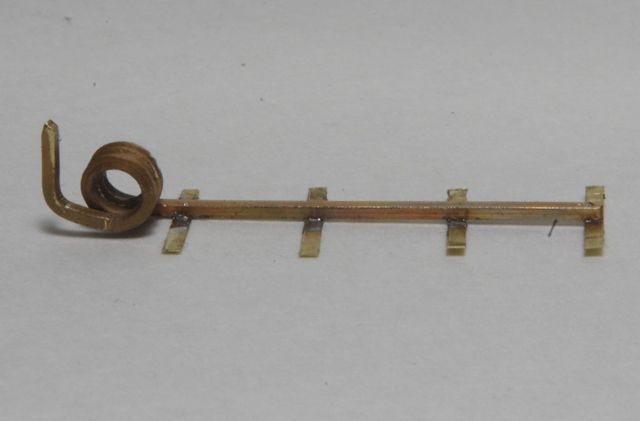 Bent, trimmed and drilled .018 for mounting (still to be made) mudflap. These were the easier pair to lay out as other set is angled 45 deg. at outer ends. 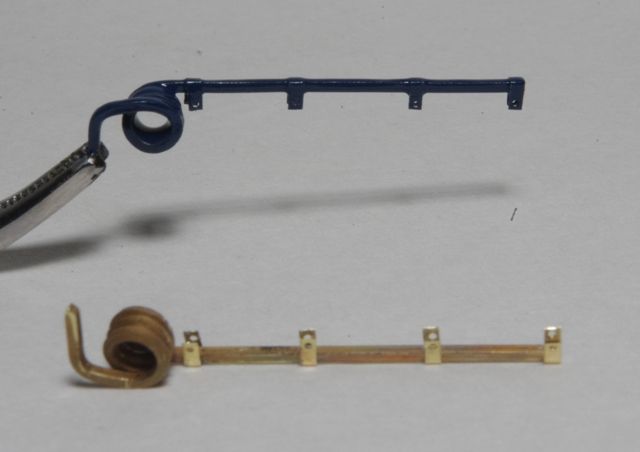 |
|
|
|
Post by ap40rocktruck on Jan 28, 2013 19:00:27 GMT -8
|
|
|
|
Post by gator on Jan 29, 2013 5:25:35 GMT -8
Way Cool!!!!
Be Well
Gator
|
|
|
|
Post by slurrydog on Jan 29, 2013 6:39:37 GMT -8
Those are really nice.
Dave
|
|
|
|
Post by rnagle on Jan 30, 2013 17:49:27 GMT -8
Thanks Dave, back to plastic for the mudflaps which are .015 styrene sheet with .015 x .060 strips, works out to within .002" of square bar hanger thickness. Guidelines lightly scribed .060" in from edge, this is more accurate than trying to draw them on with pencil. Inside corners made from .015 styrene and attached first, then outside strips. Easiest to cut flap itself to required size, leave everything else long and trim back after cement has cured. 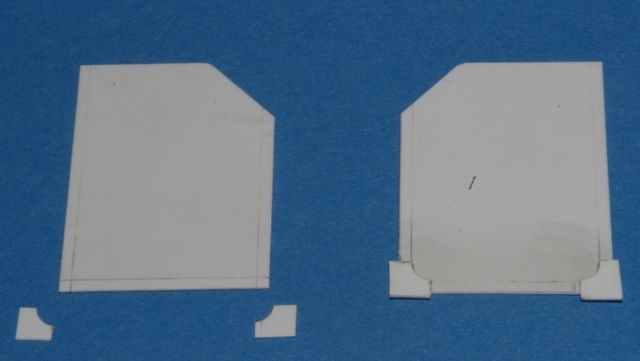 Rest of strips filled in then bottom corners cut & filed round. Still to be done is application of liquid surface primer at joints & sand smooth, cleaner job that way than using putty. 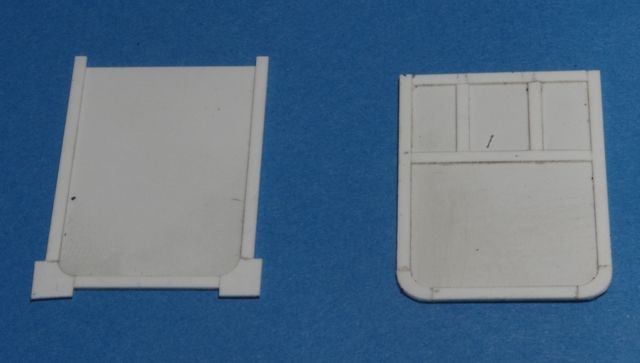 |
|
|
|
Post by rnagle on Jan 31, 2013 17:38:40 GMT -8
The mud flap saga continues! I of course had to pick what was likely the only truck in Labatt's fleet with 4 mudflaps out back! (Extra set between drive wheels added at driver's request) Tamiya liquid primer/surfacer applied to all joints & sanded smooth. Rouned corners at bottom were rough cut then filed/sanded smooth. 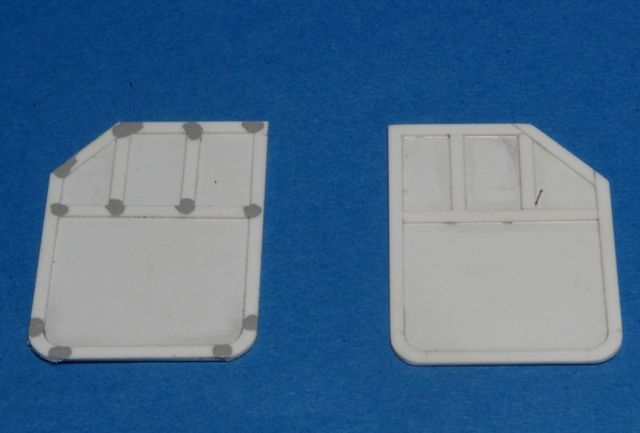 Painted white (white primer used here) then mounting holes drilled, .020 brass wire pins installed, left long then trimmed back after securing with a drop of adhesive. While a bit fiddly this seemed the best way to mount them as there is very little surface area for gluing. Decals still have to be made for Labatt's logo, will do that later when drawing rest of lettering as mudflap logo is just smaller version of door & trailer one. 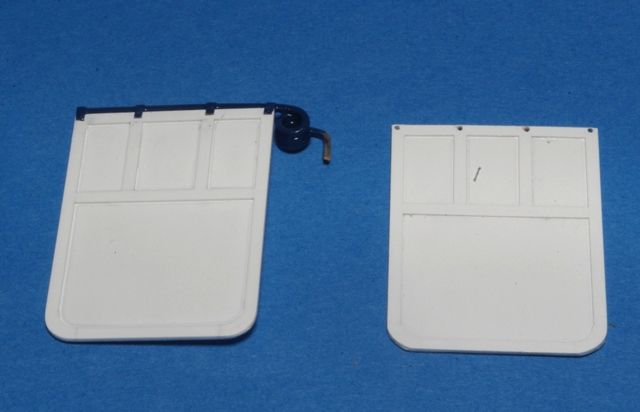 |
|
|
|
Post by slurrydog on Jan 31, 2013 18:26:19 GMT -8
Reaaly cool mudflap detail, going to look great.
Dave
|
|