|
|
Post by rnagle on Feb 17, 2013 19:33:07 GMT -8
Thanks guys! The "cross-eyed madness" theme seems to be taking hold, using kit parts as a guide .020 styrene strips cut & attached to represent upholstery pattern on back wall. 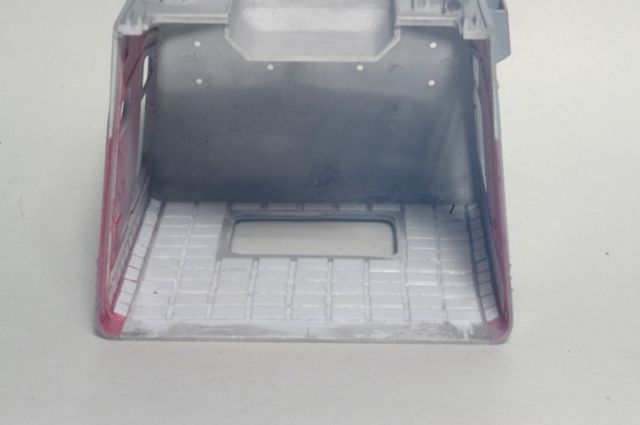 And kit exhaust pipe used for this section, bend adjusted slightly to fit different engine (Italeri's Peterbilt kit comes with Series 60 Detroit) and sanded smooth, flex pipe section represented with wrap of 32 gauge craft wire. Band clamps .005 shim brass (leftover sections of strip cut for fuel tank straps) with .020 x .040 styrene strip and model railroad detail parts for bolt heads. Pyrometer fitting is .010 styrene disk with 1/32" brass tube. 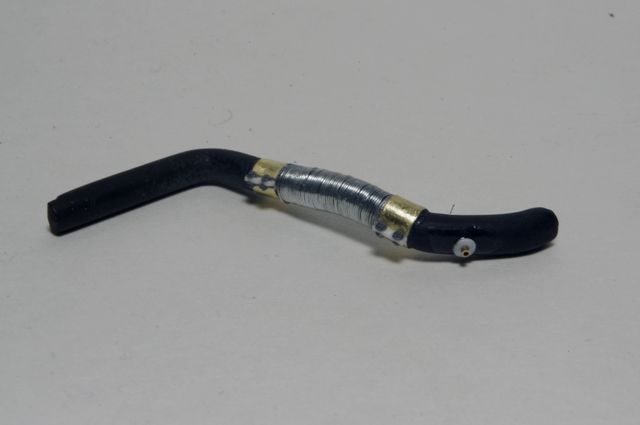 |
|
|
|
Post by slurrydog on Feb 18, 2013 7:11:16 GMT -8
Wow. Really nice detail.
Dave
|
|
|
|
Post by ap40rocktruck on Feb 18, 2013 7:41:05 GMT -8
all i have is WOW, feeling cross eyed yet??
Ap40
|
|
|
|
Post by shovellogger on Feb 18, 2013 8:42:58 GMT -8
I had lazer on my eyes and after all this cross eyed madness might have to wear glasses again awesome pete awesome detail
|
|
|
|
Post by rnagle on Feb 18, 2013 16:32:03 GMT -8
Thanks! Yes, definitely feeling cross-eyed after installing exhaust pipe. Finish is Testors Silver brushed on, after it dried Badger Modelflex Roof Brown used to give weathered appearance. Modelflex is pre-thinned for airbrushing so works well as a wash for applications like this. Clamp is silver decal paper cut to .080 wide. 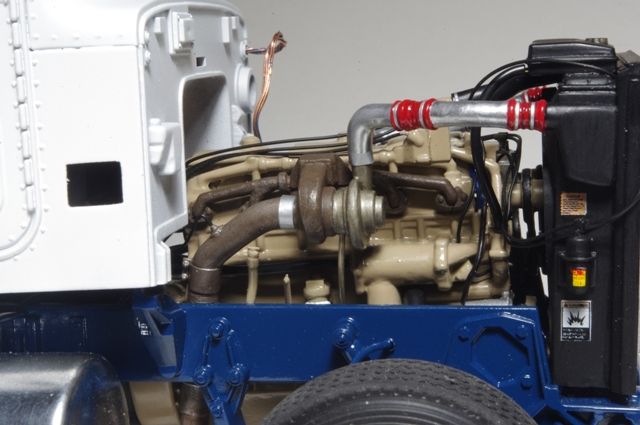 Less tedious work on the seats: Passenger seat on this truck was on a seatbox, kit parts used for seat mounts on styrene box. Pieces from kit air ride seat base used to raise driver seat slightly as it looked a bit low when mocked up in cab. 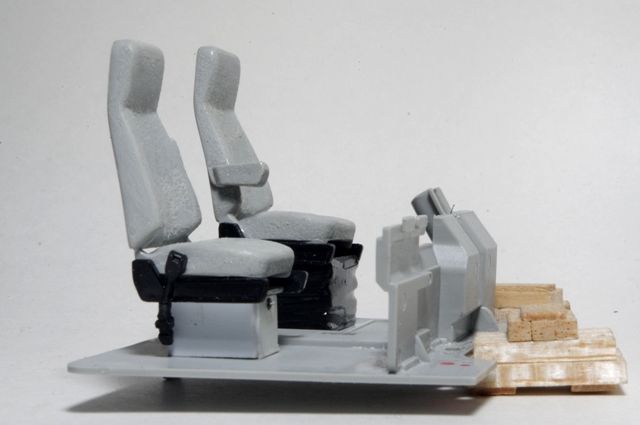 |
|
spimike
RIGGER
   logger till the end
Posts: 190
|
Post by spimike on Feb 18, 2013 17:02:05 GMT -8
looking real Robert, love all your little details sure makes it pop.
|
|
|
|
Post by rnagle on Feb 20, 2013 17:50:33 GMT -8
Thanks! An admission: some "sleight of hand" has been employed, space between firewall and cab interior on the Italeri Petes is handy for leaving hoses & wiring bundles extra long & tucking them up inside. Holes added in cab floor as required, 2 wiring bundles that stop in mid air will go to firewall once cab installed permanently. 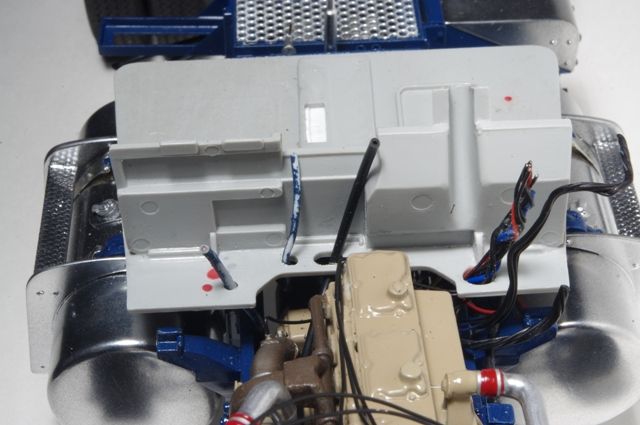 Clutch pedal added as kit does not come with one, representation of linkage bent from .032 brass wire. Styrene strip & wire represent brake valve & lines down to frame. 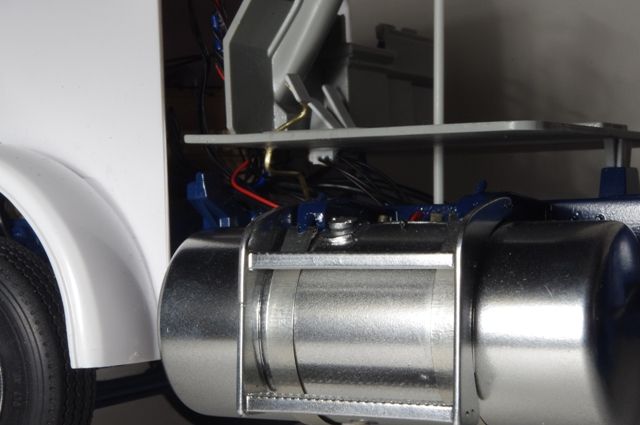 Pedal pads made from Evergreen N scale car siding, .020 thick. Scribed surface does a good job of representing grooved pedal pads. 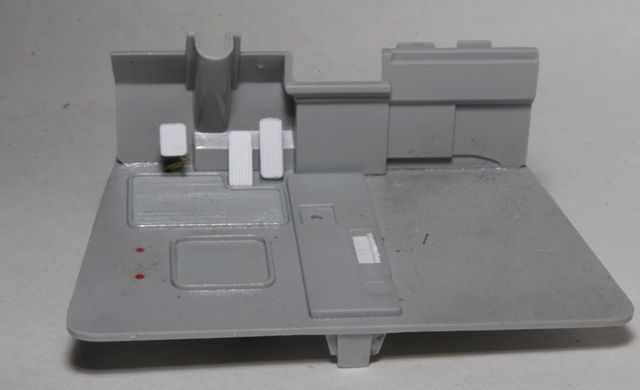 |
|
|
|
Post by gator on Feb 20, 2013 19:03:00 GMT -8
Robert,
Now that is getting down to some small parts! geesh But I love the details.
Be Well
Gator
|
|
|
|
Post by trailking120 on Feb 21, 2013 4:43:00 GMT -8
I've said it before outstanding   |
|
|
|
Post by slurrydog on Feb 21, 2013 6:37:09 GMT -8
And I was so proud of myself when I didn't get any glue on the windshield of my last build  Your workmanship and the detail you have in this is just amazing. Dave |
|
|
|
Post by ap40rocktruck on Feb 21, 2013 10:46:56 GMT -8
|
|
|
|
Post by rnagle on Feb 21, 2013 19:23:26 GMT -8
Thanks guys - this little item turned out to be easier than expected: Washer bottle molded to cab has correct shape but is quite shallow, also difficult to paint. Evergreen .250 x .250 styrene strip cut & filed to shape, left in white plastic with thinned Tamiya clear blue brushed on. It is attached to a short piece of 1/16" brass rod which served as a holding fixture, molded on washer bottle ground off firewall and hole filled with styrene sheet on back side. Bottle set in place for photo, will come off while finish work on cab continues. 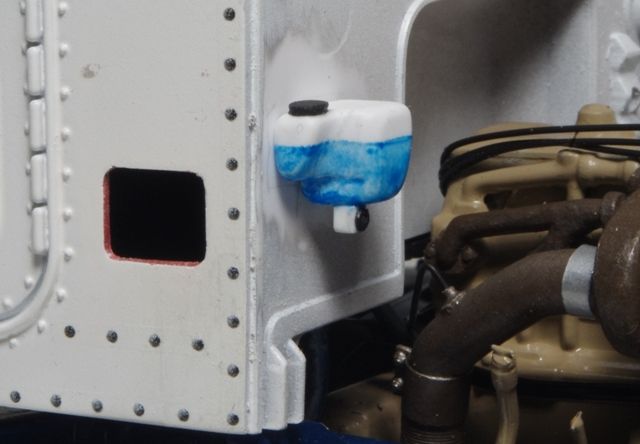 |
|
|
|
Post by slurrydog on Feb 22, 2013 6:34:26 GMT -8
Wow, that is great.
Dave
|
|
|
|
Post by rnagle on Feb 22, 2013 19:45:38 GMT -8
A couple modellers pointed out how to make washer bottle look better with thin overcoat of white, many thanks for the advice. 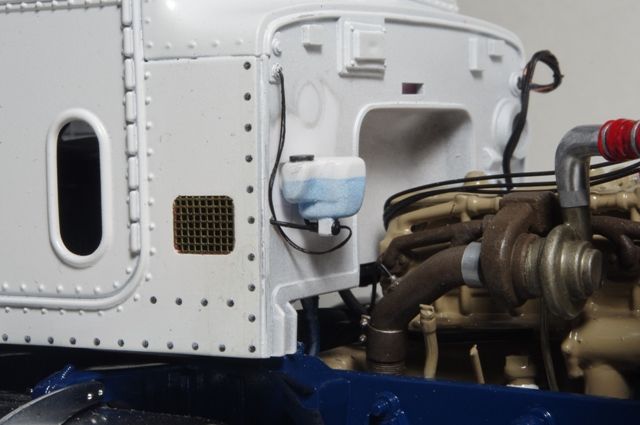 |
|
|
|
Post by ap40rocktruck on Feb 23, 2013 12:53:44 GMT -8
Yeah Rob, that white wash over the blue makes all the difference.
Ap40
|
|