|
|
Post by Muleskinner on Feb 11, 2012 19:01:59 GMT -8
outstanding looking model there robert. As gator said the paint looks great.
|
|
|
|
Post by slurrydog on Feb 12, 2012 6:30:45 GMT -8
Robert that looks just right. Great job on this one.
Dave
|
|
|
|
Post by loghauler70 on Feb 18, 2012 19:10:12 GMT -8
Great looking model I can't wait to see it finished.
Mark
|
|
|
|
Post by rnagle on Feb 19, 2012 4:01:36 GMT -8
Thanks! Getting the next round of parts ready for Alclad, bumper is resin item Ray (R766ST) gave me with styrene bolt heads added along with kit fog lights and a short piece of styrene angle to attach licence plates. Grille on 1:1 truck had the shutters visible, kit grille frame used with mesh (carefully!) cut out, Evergreen .100 half round strip used for shutters on .040 styrene panel. Kit mirrors used, bracket ends flattened and .060 styrene angle mounting bracket added: 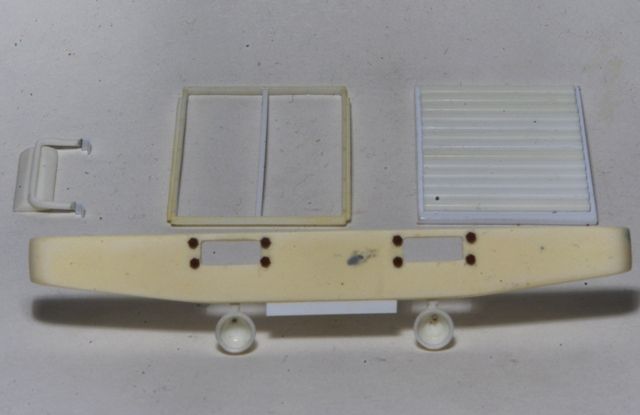 "Modeller's licence" used for a couple dash clutter items: Scanned Feb 1974 National Geographic cover (article featuring this truck was in that issue) and AMT's 352 instruction sheet: 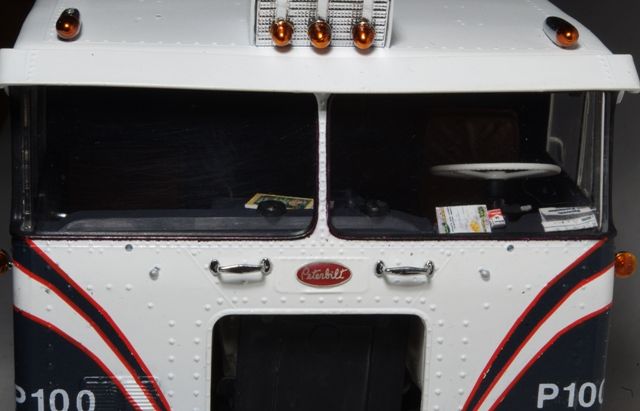 |
|
|
|
Post by Muleskinner on Feb 19, 2012 11:37:54 GMT -8
Now thats detail. Drivers liturature and all.!!!! Wow!!
|
|
|
|
Post by slurrydog on Feb 25, 2012 8:56:02 GMT -8
Great detail, very nicely done.
Dave
|
|
|
|
Post by rnagle on Feb 25, 2012 20:05:34 GMT -8
Thanks! Many, many things left to add yet.........but the front wheels are on so now this tractor can stand on its own "feet"! Alclad aluminum used on front wheels with Alclad chrome on hub covers. Different Alclad shade, duraluminum, on mufflers. Will make stacks themselves from aluminum tube so they can be polished. 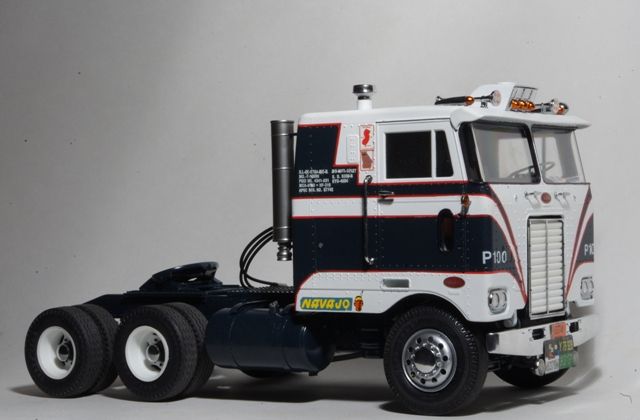 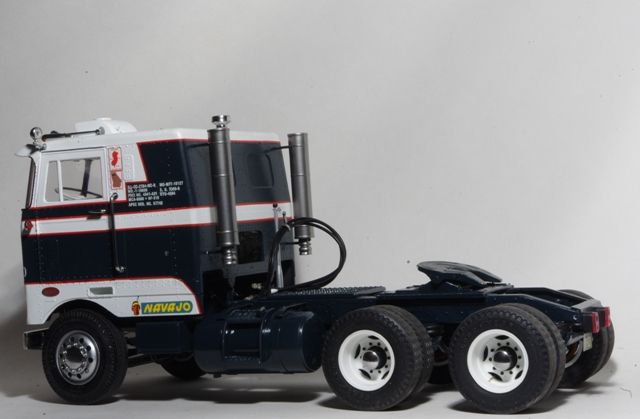 |
|
|
|
Post by Muleskinner on Feb 25, 2012 20:30:06 GMT -8
Now this is coming along really nice there Robert.
|
|
|
|
Post by rnagle on Feb 27, 2012 19:11:53 GMT -8
Thanks! From the right camera angle I could almost claim this one is complete, however I cannot tell a lie: One big chore remains, that of fitting the wretched exhaust pipes from engine to stacks! The chrome upper stack pipes are aluminum tube cut on a 45 and polished. Italeri mud flap brackets used with the Pete 352 kit mudflaps: 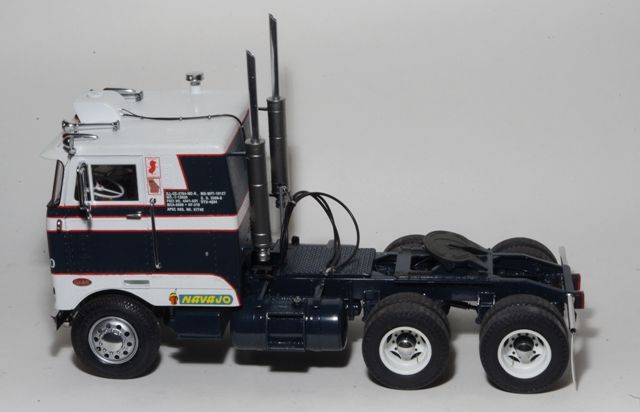 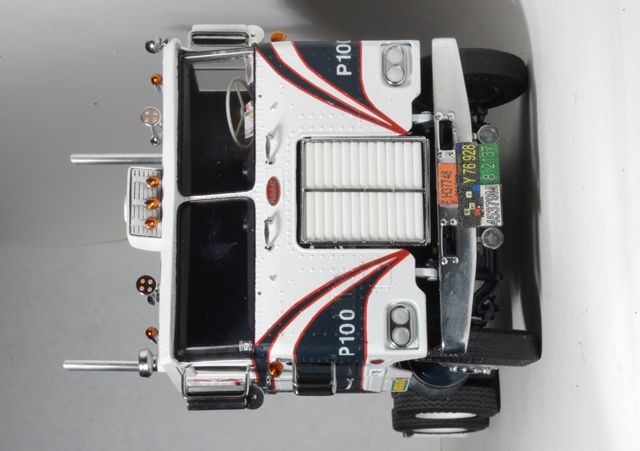 |
|
|
|
Post by Muleskinner on Feb 27, 2012 19:46:53 GMT -8
good show there Robert. I like the mods you done and especially the Navajo markings. In the prehistoric days a lot of the Navajo units had a small light on the top of the cab which illuminated the Navajo head emblem on the front of the trailer at night. Just a bit of history there.
William
|
|
|
|
Post by tufftin on Feb 28, 2012 10:32:47 GMT -8
You have done a fabulous job. Don't quit now. Start another.
Mike
|
|
|
|
Post by slurrydog on Feb 28, 2012 20:44:29 GMT -8
Turned out great Robert, I have always liked the look of the 352.
Dave
|
|
|
|
Post by rnagle on Mar 14, 2012 17:54:54 GMT -8
On the final stretch now - AMT fit issues? Never heard of such a thing - aren't the exhaust pipes supposed to line up like this?  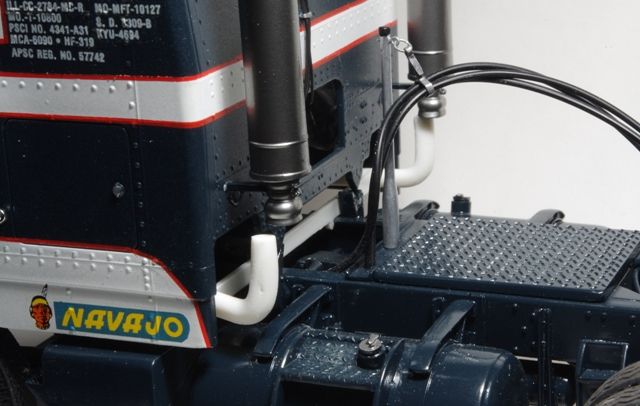 Exhaust pipe support set in place, pipes cemented to support and "tack glued" to exhaust manifolds. 90 deg. bends that go up to stacks cut off and re-attached using laminated styrene disks and a piece of sprue on driver side pipe. Styrene disks also used to lengthen pipes so they meet bottom of stack. Once cement cures thoroughly it will be easy to break glue joints free at engine and remove subassembly for cleanup. 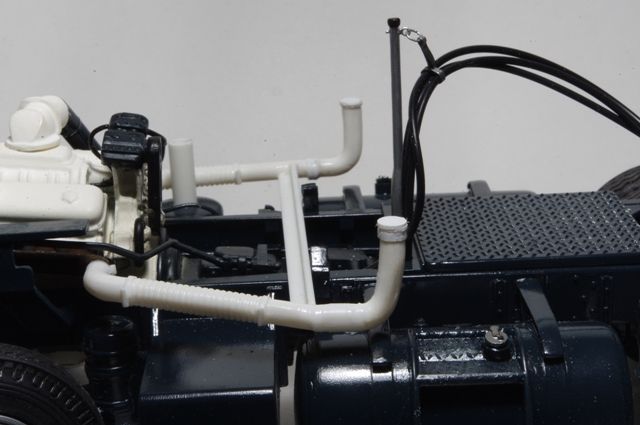 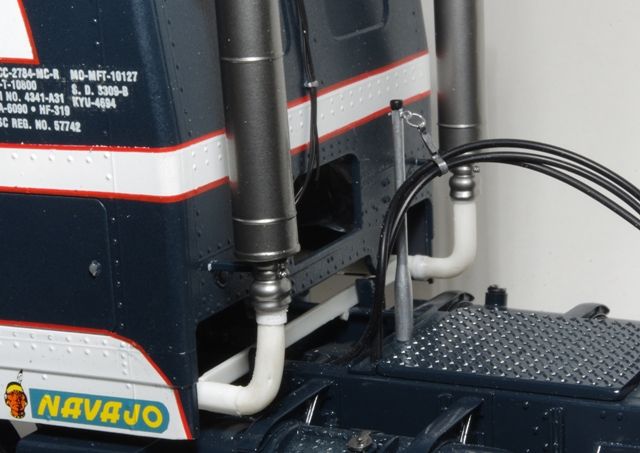 |
|
|
|
Post by Muleskinner on Mar 14, 2012 18:13:00 GMT -8
Looking good there robert. I don't know how many ofthese COE Petes I have put together and still have the same problem with the pipes lining up. I usually end up trashing them and make my own. I remember when this model kit came out back in the mid 70's it had the same problem.
The way you did yours reminds me of the old asbetus (sp) doughnuts which went on the end of the early 1:1 units where the pipes connected.
|
|
|
|
Post by rnagle on Mar 14, 2012 18:19:57 GMT -8
Thanks William, I thought about starting from scratch with the pipes, decided to go with kit parts as they do have good "flex pipe" detail molded in, just the stack end needed rework. The tack glued connections to manifolds are one area where a relatively brittle super glue joint can be of advantage - usually it's a case of having to make the joint stronger by pinning it or using epoxy.
|
|