|
|
Post by ewaskew on Apr 5, 2012 1:48:58 GMT -8
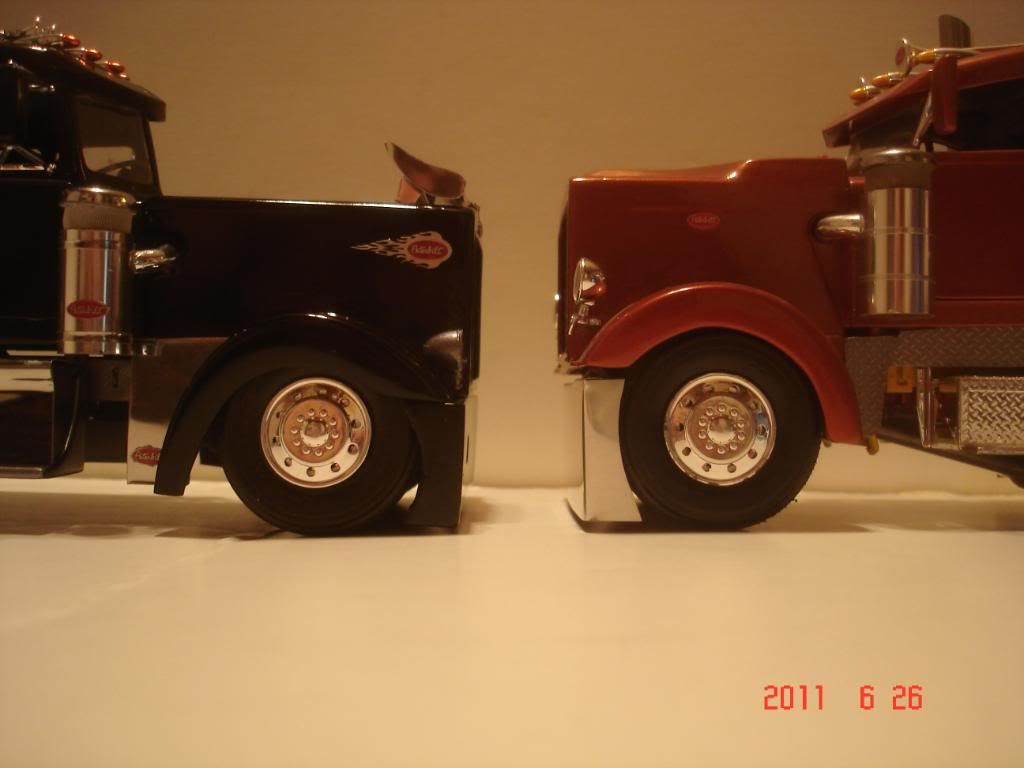
This is one that I'm working on now and I'll have to finish it before building any thing else. Its the one that I have to break the to many unfinished builds problem that I have right now. Mock up with the bumper striped and change up a little. Cut the out side edge's and tucked them in closer to the body. Drilled out the light's and used beads for headlight's still have to do the signal's. Cut the grille out from the back side and added a small strip to the opening. 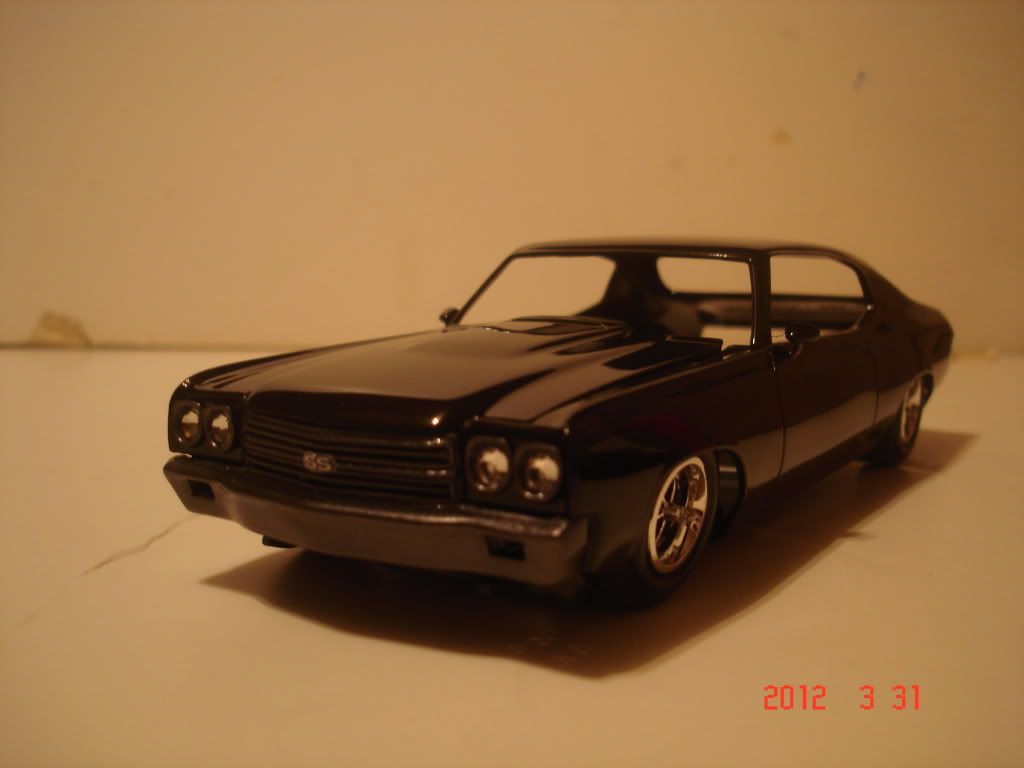 Engine bay NOT finished still needs touch up paint and some small details added. 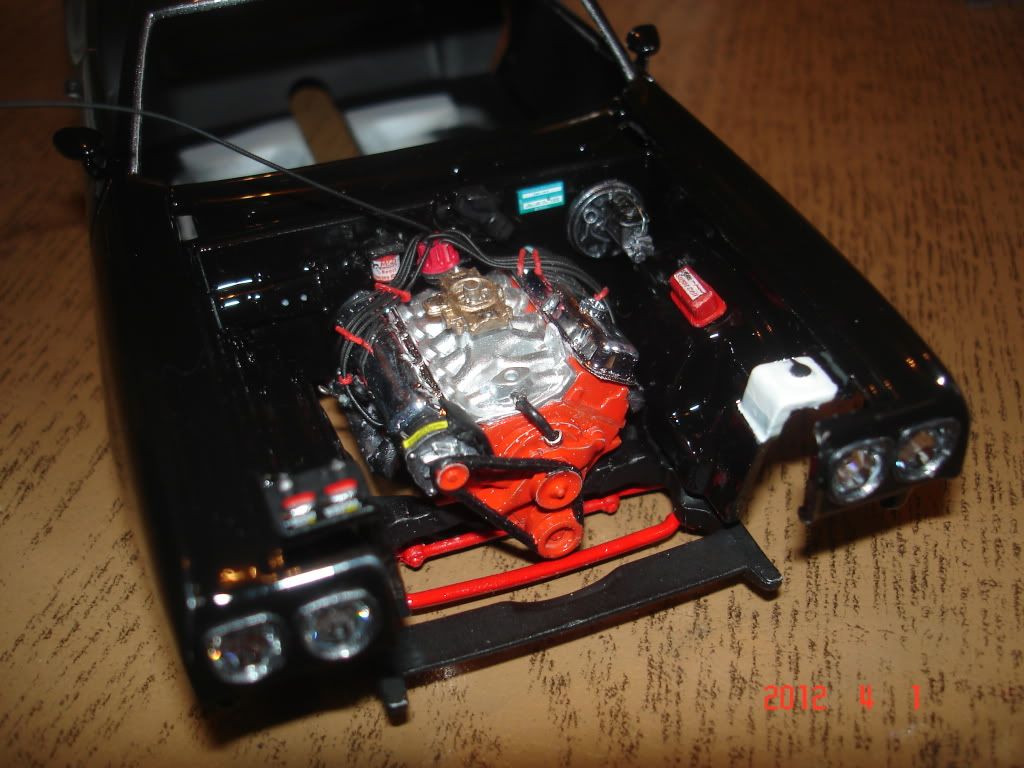 Got the paint nice and slick 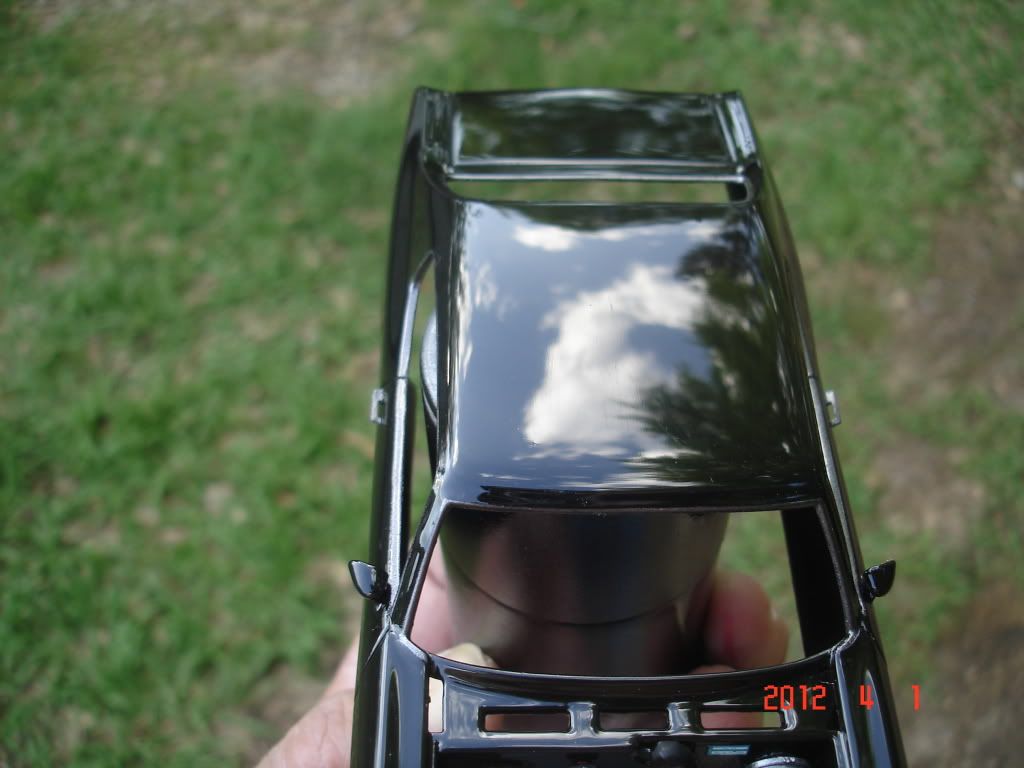 |
|
|
|
Post by Muleskinner on Apr 5, 2012 4:15:30 GMT -8
Earl,
even though I gave up on model cars years ago, I still love to see what people are doing with them and can honestly say I am impressed with this build. I remember these Chevs when they first hit the car lots back in the 70's as they were the custom builders choice in 1:1. I was always into Fords and MOPARS but there was just something about this Chev when it first came outr which caught my eye and a lot of others I imagine, with the way their popularity zoomed all of a sudden onto the highways.
Will be watching this build as it sparks a lot of memories of my prehistoric days back them.
|
|
|
|
Post by gator on Apr 5, 2012 7:16:01 GMT -8
Earl,
Like William I remember back in the day when these cars came out.You know back in the muscle car days!!!
Cool looking model. I like the headlight idea!
Gator
|
|
|
|
Post by slurrydog on Apr 5, 2012 7:49:05 GMT -8
You have done a very nice job.
Dave
|
|
|
|
Post by Ryan Rønning on Apr 5, 2012 15:02:50 GMT -8
Good looking car. Engine looks great!
|
|
|
|
Post by ewaskew on Apr 7, 2012 1:35:19 GMT -8
This needs door locks and thats it. And I have them scratch built and paint drying,something simple that most of us don't do. Before 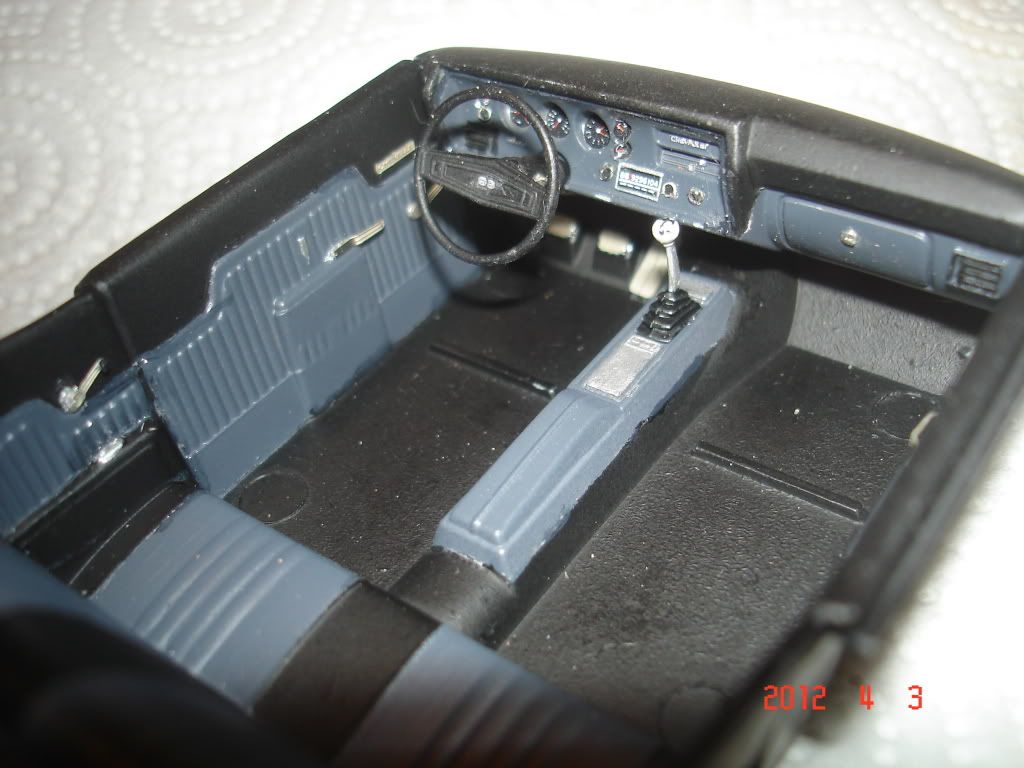 After Seat bealts are masking tape painted flat black with plastic for connectors. Carpet,custom floor mats,window cranks are Photo etched item's with mounting base and knob's added. Door handles with mounting base and bent just a little like the photo's I went by. Decals for the dash and a key in the switch. And my first set of scratch built speakers for the rear deck. The shifter has a shift pattern on it like the photos I went by. 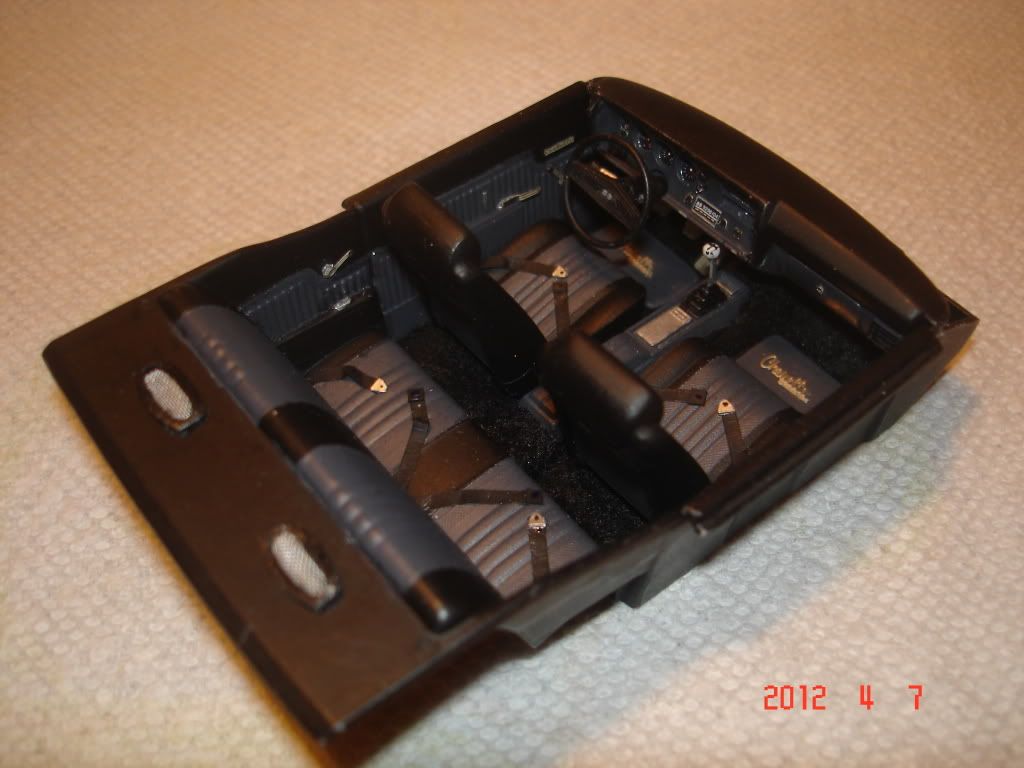 |
|
|
|
Post by gator on Apr 7, 2012 20:46:38 GMT -8
Earl,
The interior is really sharp looking! That looks like it could be in a Barret Jackson Auction!!!
How about a how to on the door locks??
Gator
|
|
|
|
Post by ewaskew on Apr 8, 2012 2:17:52 GMT -8
Earl, The interior is really sharp looking! That looks like it could be in a Barret Jackson Auction!!! How about a how to on the door locks?? Gator Gator all you do is take the parts tree and heat it so you can pull it without breaking it. Pull it slowly,when it gets stretched out you look at the area that will look like the right size for a door lock. If you want straight door locks just cut it and glue it in place. If you want it flat at the top just squeeze it with tweezers. If you want the type with a head on it. Cut it,then heat the hobby knife and press it to the plastic. It's the same as heating tie rod ends I had to do it a few times before I got what I wanted. But its just one more detail that will stand out. Heating the parts tree and stretching it also makes very nice antennas. This is what it should look like before you cut it off of the tree. 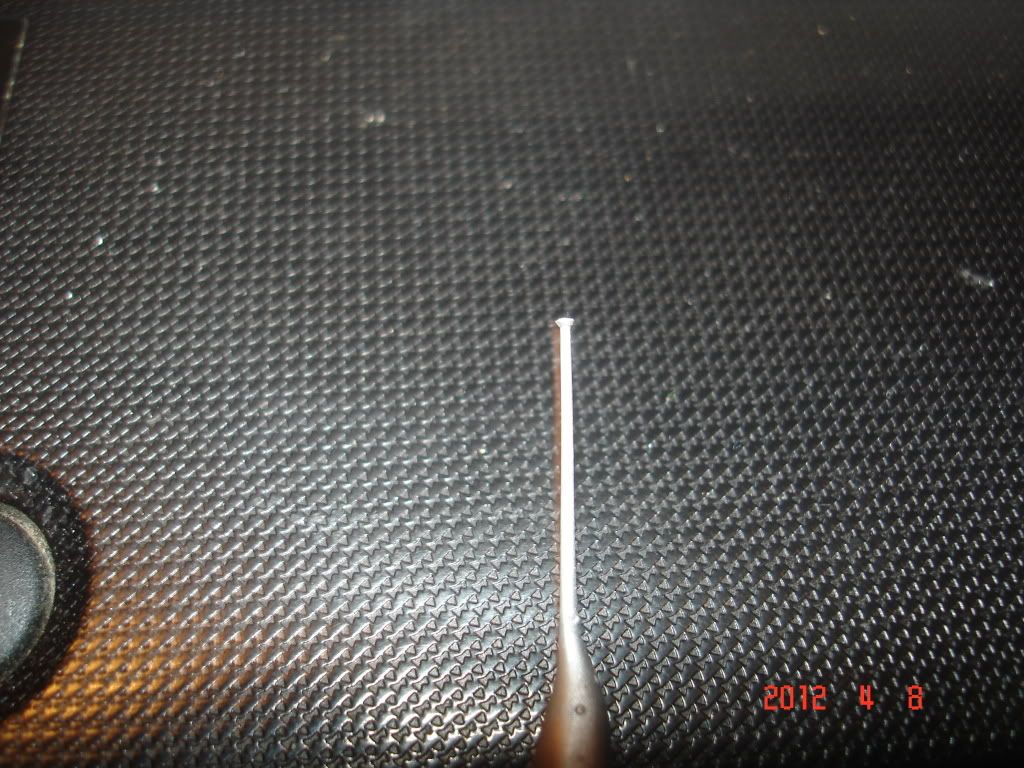 |
|
|
|
Post by ewaskew on Apr 8, 2012 3:05:17 GMT -8
Thanks for all the comments everyone. The interior is in the car now and more details have been added to the eng bay. Today is frame day This is the starting point. When its finished it will have the line's ran and Disc Brake's All bad areas will be touched up with paint. This is being built as a driver with a few custom touch's added to it. The front end has scratch built shocks and coil springs added. The spindle had to be cut for Clarence to get the springs in place. The tie rod and sway bar was cut off cleaned and placed back on so it would look better than the molded in look on the kit. I painted the parts red so they could be seen better. 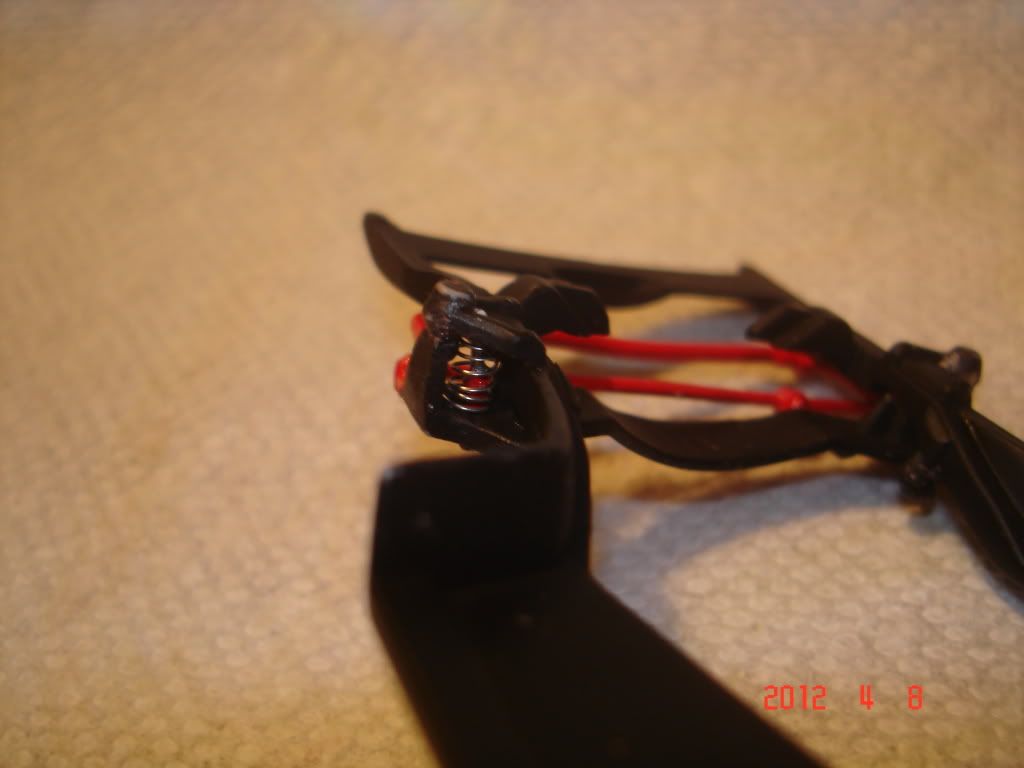 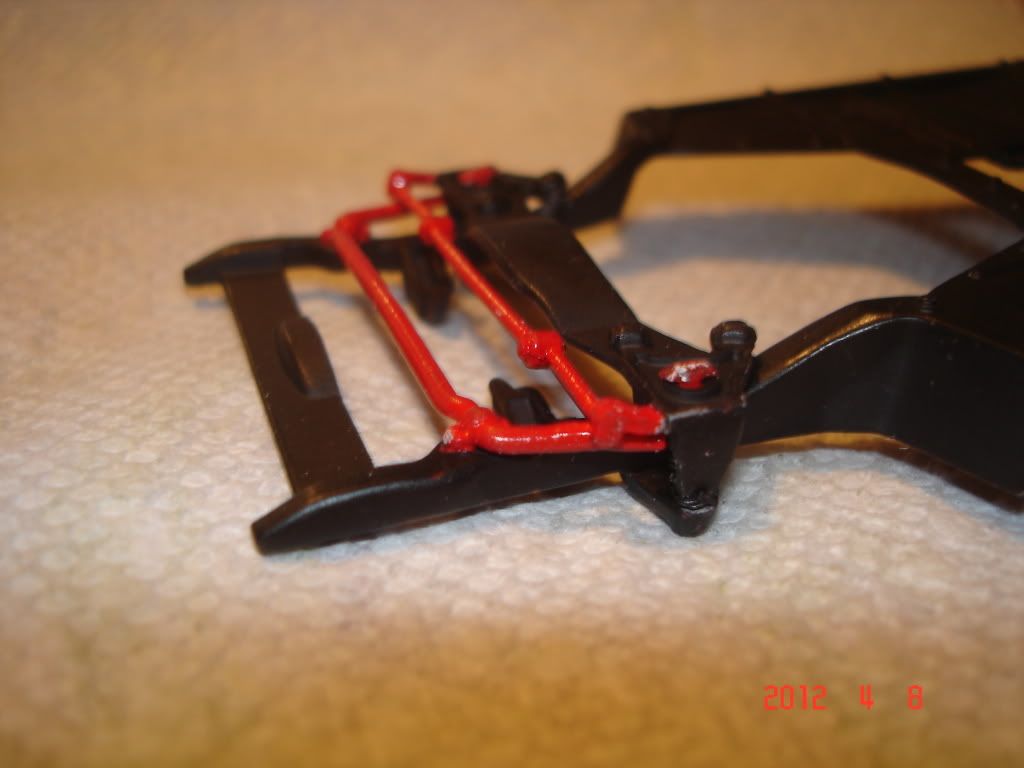 The rear end has o-rings for air bags. The bow tie was carved into the tank for a custom look. 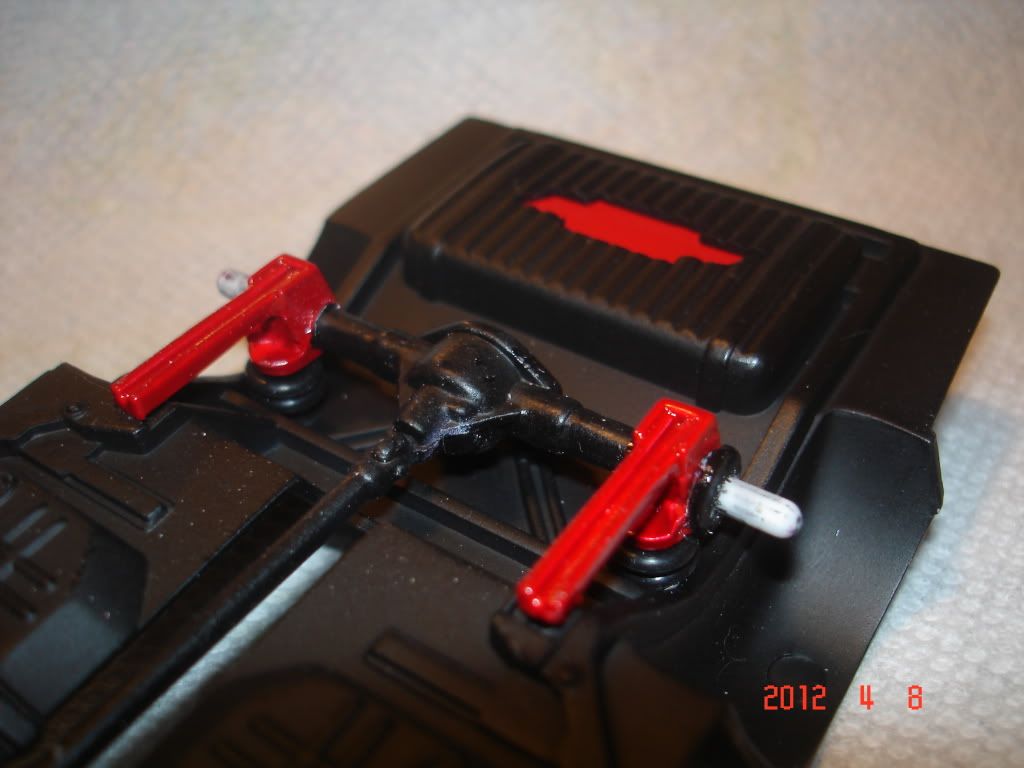 |
|
|
|
Post by gator on Apr 8, 2012 8:20:44 GMT -8
Earl,
Thanks for the tips!
Gator
|
|
|
|
Post by kerry on Jun 5, 2012 14:06:26 GMT -8
Wow Earl, that is so cool. The tips and how to's are great. I haven't done a car in years but I do have a couple that need restoring. Great inspiration Earl and a very nice build.
Kerry
|
|
|
|
Post by jfisher on Jul 4, 2012 5:45:05 GMT -8
looking good did this one get finished up?
|
|
|
|
Post by ewaskew on Jul 4, 2012 13:22:31 GMT -8
looking good did this one get finished up? Yes it did I just forgot to post the photos so here ya go. However there is an end to my building and this is the last one that I was able to finish before I gave it up. This is the best one I have as far as cars and I have a few nice ones. I hope all of you enjoy it because it may be a real loooooooong time before I build anything if I build anything ever again. This use to be my outlet from daily depression but now my desire to do it is gone. Thanks for looking everyone. 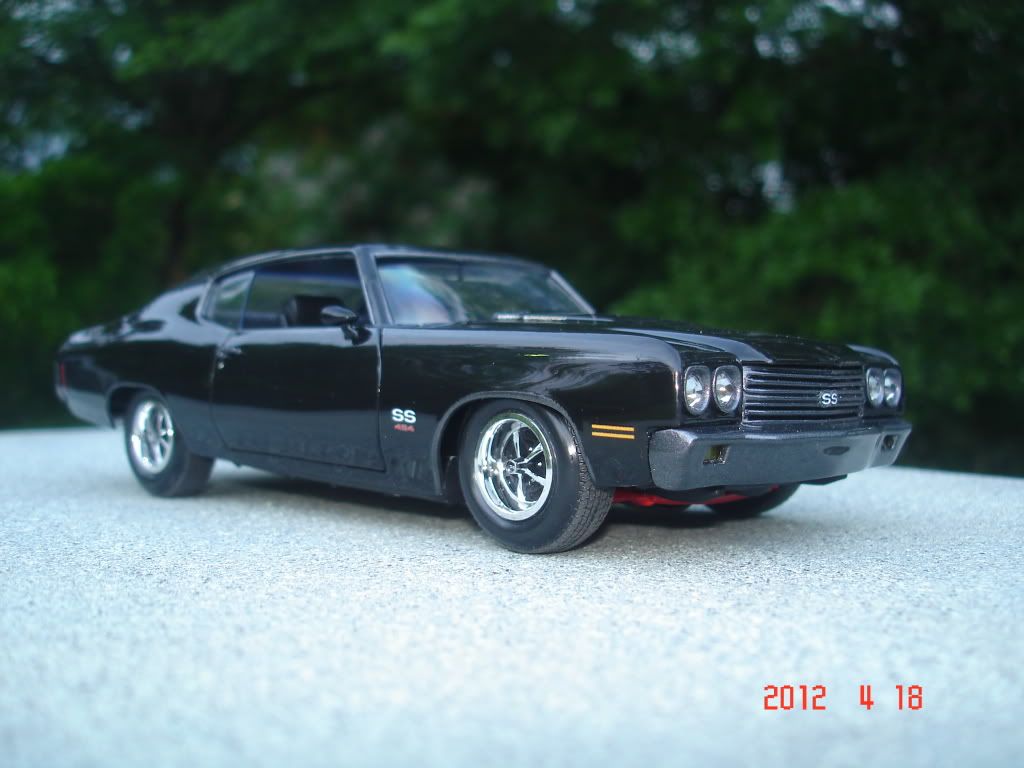 Engine bay full of scratch built items Spark plug separators,oil stick.ing box brake booster cap lock,brake lines,fuel lines hose's with clamps,coil,battery cables,wireing harness.  Highly detailed interior it even has the shift pattern painted on the shiffter 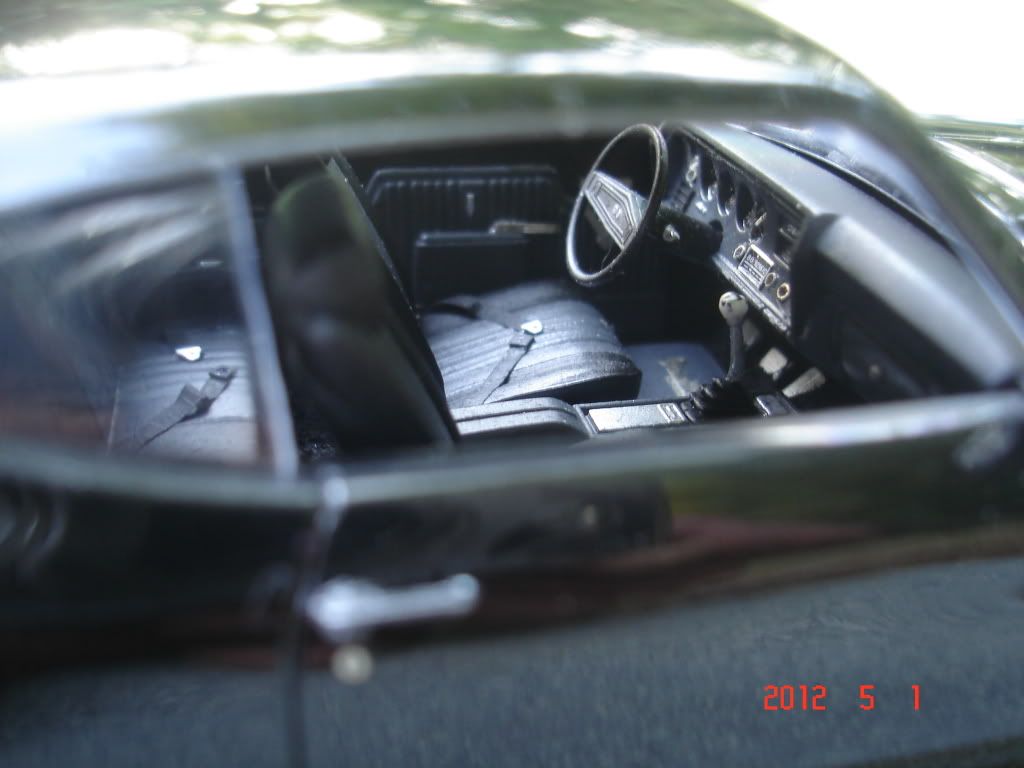 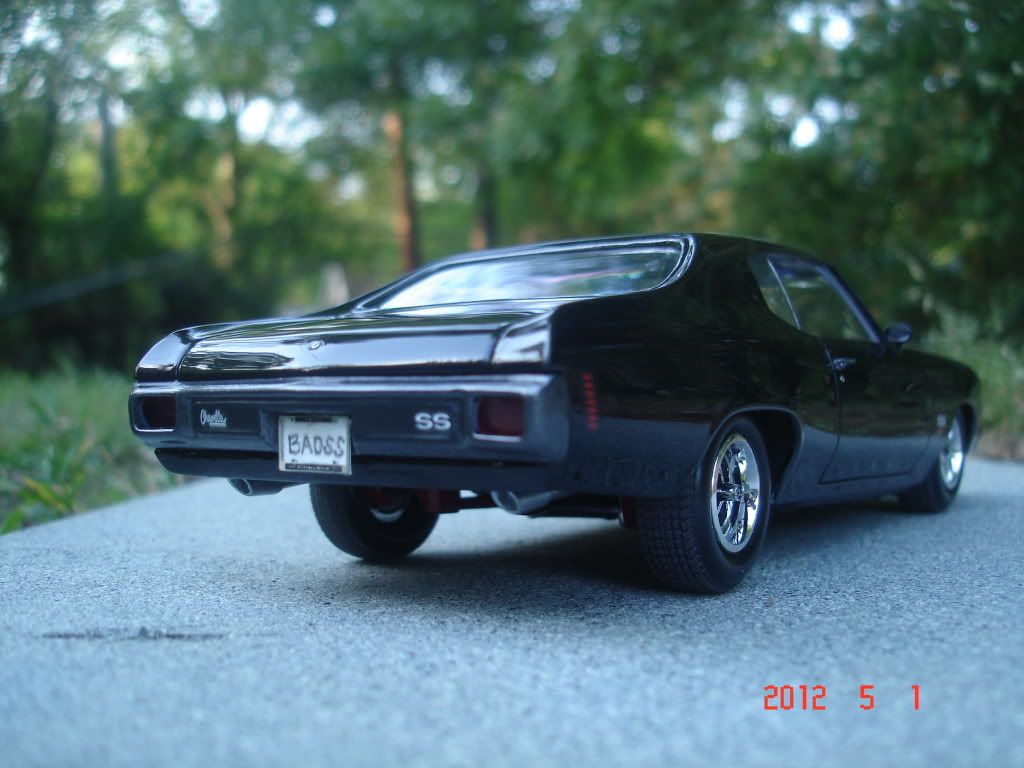 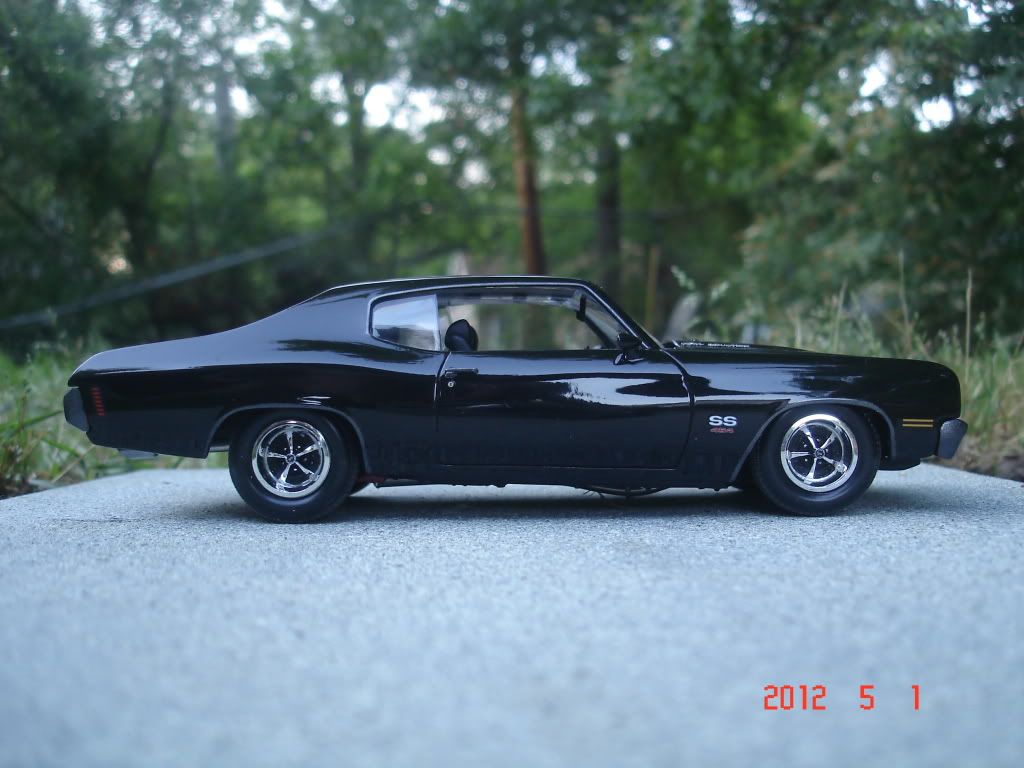 |
|
|
|
Post by jfisher on Jul 4, 2012 16:55:37 GMT -8
thanks for the pix Earl.I hope you get back into building again.very nice job!
|
|
|
|
Post by Muleskinner on Jul 4, 2012 18:50:30 GMT -8
hey earl, you can't quit on us now. You do some fantastic builds and need to keep em comin!!!!
William
|
|