|
|
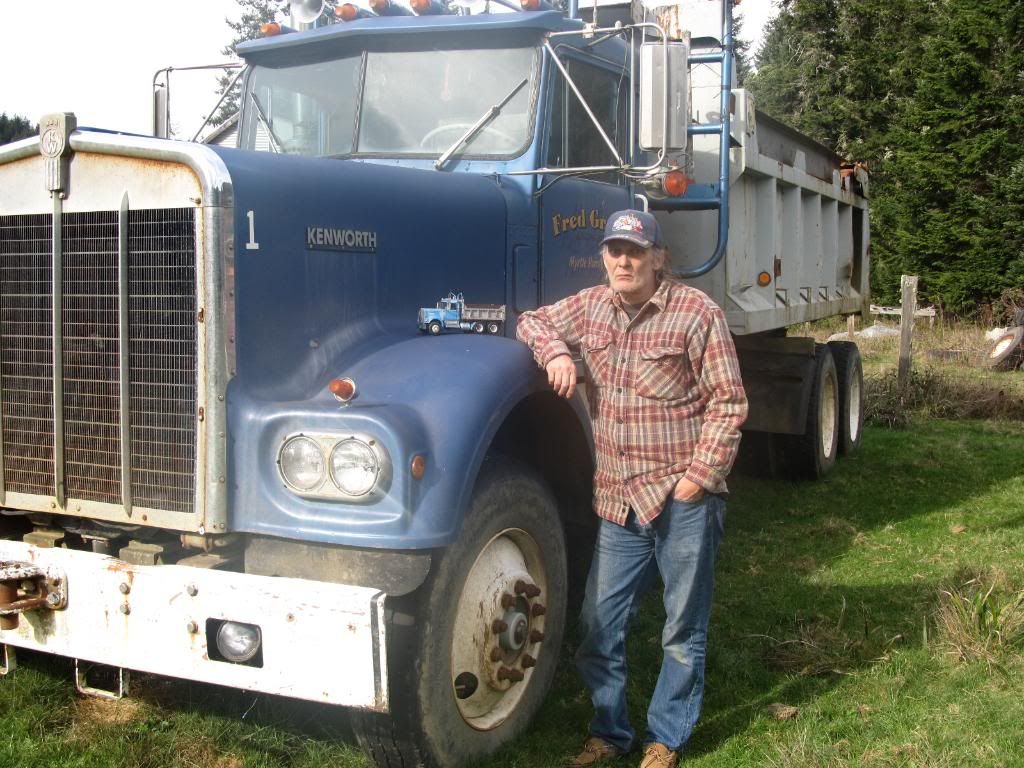
Post by Robert Myers on Jul 22, 2012 13:48:51 GMT -8
WELL....This just detailing a completed model got a little out of hand. This is the way the truck looks tonight. I thought I should continue the thread here.  Rick sent me an email showing how to modify the suspension (THANK YOU) to accept the new resin tires. That is done and repainted. The old duals are just tacked on with Elmers glue while I do the mock up on the front end. All of the hydraulics were taken off and are being repainted/rebuilt. Since this has turned into a major rebuild, my Lonestar is on hold, but you may recognize the blue engine color paint that I spilled on the glass. |
|
|
|
Post by ap40rocktruck on Jul 22, 2012 16:58:23 GMT -8
Robert,
Looks great, i have the same thing happen when i drag out something i built many moons ago. It starts with the idea of a quick easy rebuild, that morphs into a full on tear down. But in the process we will learn more & grow as a modeler.
Ap40
|
|
|
|
Post by tufftin on Jul 23, 2012 6:19:38 GMT -8
Same thing in real life. An afternoon project turns into a month of hard work.
Mike
|
|
|
|
Post by gator on Jul 23, 2012 6:57:32 GMT -8
Robert,
That is really going to be a different truck when you get er done!!!
Be Well
Gator
|
|
|
|
Post by Joris Scholte on Jul 23, 2012 9:25:27 GMT -8
Nice, looks great so far!
|
|
|
|
Post by Robert Myers on Jul 23, 2012 17:25:35 GMT -8
Thanks!!!
|
|
|
|
Post by Muleskinner on Jul 23, 2012 17:49:37 GMT -8
I never worry about the tear down part of building, I just set it where my cats can get it and they reduce it to a pile of parts in no time. All I have to do is rebuild.
|
|
|
|
Post by Badluck 13 on Jul 23, 2012 18:16:22 GMT -8
Thought she was a great looking build before,and I am sure its even gonna look better,what did ya have to do to modify the suspension?
|
|
|
|
Post by Ryan Rønning on Jul 24, 2012 11:06:28 GMT -8
Cant wait to see it done
|
|
|
|
Post by Robert Myers on Jul 24, 2012 17:01:57 GMT -8
The front and rear suspension was lowered slightly to maintain the same tire clearance . I cut just under the front and rear springs and used small plastic spacers so it still looks stock. Thank you Rick for showing me how.
The mounts for the differentials were moved just a bit apart by cutting the tops of the diff. mounting plates off and making new ones with just a little more offset to the front/rear. We are only talking a 1/16 of an inch total. You don't have to do it, but I think it makes a difference.
The drive shaft was lengthened and refit. Luckily, I still had a new rattle can of the same color paint to do the new wheels and modifications.
The next step is cutting some new mud flaps and mounting them on chains.
|
|
|
|
Post by slurrydog on Aug 3, 2012 21:11:26 GMT -8
Your hard work is going to pay off.
Dave
|
|
|
|
Post by Robert Myers on Aug 5, 2012 11:56:46 GMT -8
Thank you! I have finished the KW and moved it to completed comm.
|
|