|
|
Post by gator on Jan 3, 2013 18:12:03 GMT -8
Robert,
Really a great start, with some very interesting detail!
Be Well
Gator
|
|
|
|
Post by rnagle on Jan 6, 2013 7:39:03 GMT -8
Thanks gator! In addition to wheels I have raided other parts from Italeri's "US Wrecker Truck" Ford LTL9000 kit, rear driveshaft for one. It was molded with half the yokes open, other ones drilled & carved out. 72" axle spread required lengthening, aluminum tube used here. This also makes it easier to fit into place as altered driveshaft can telescope like a real one. 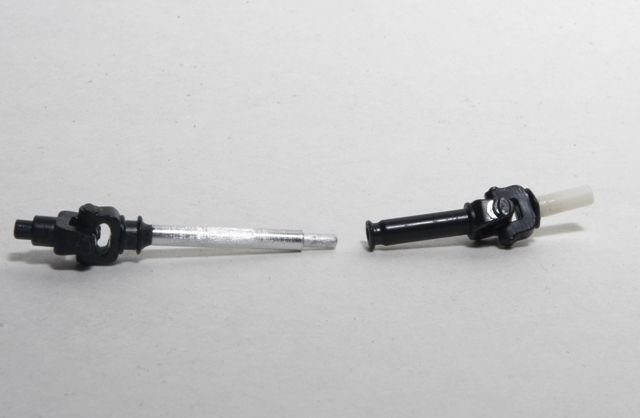 Engine fitted in place, brass wire use for freestanding oil fill pipe & dipstick. Rad also test fitted. 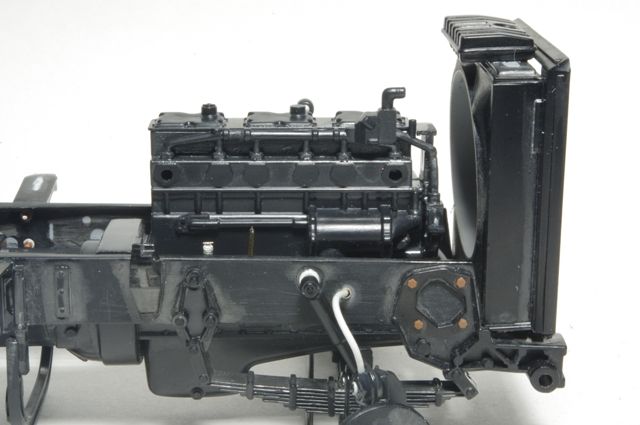 |
|
|
|
Post by trailking120 on Jan 9, 2013 6:14:00 GMT -8
great detail Robert I love it  |
|
|
|
Post by slurrydog on Jan 9, 2013 6:45:21 GMT -8
Doing some great work Rob. Looking really good.
Dave
|
|
|
|
Post by ap40rocktruck on Jan 9, 2013 13:21:26 GMT -8
Rob,
Looks great.
One small thing though. The engine should tilt to the rear of the chassis at about 5 to 7 degrees, so that the drive shafts & yokes are at the correct angle. This is true on all trucks, regardless of year or manufacture.
Ap40
|
|
|
|
Post by rnagle on Jan 9, 2013 16:22:38 GMT -8
Thanks guys - will correct the engine angle Rick, that will be easy to do. Just need to rework front mount, which I had to make up from scratch anyhow since I got away from Italeri's approach of fan molded as part of radiator.
|
|
|
|
Post by rnagle on Jan 14, 2013 17:31:57 GMT -8
Been working on other end of frame recently, Fontaine fifth wheel from Mack DM series kit, mounting plate made from styrene strip as kit one was too narrow for frame. Box at right side of photo is Webasto engine heater. 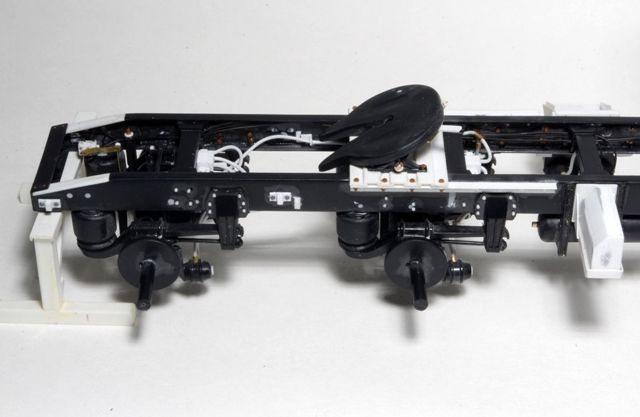 |
|
|
|
Post by ap40rocktruck on Jan 14, 2013 17:39:07 GMT -8
Dang, ROB!!
That looks sharp.
Ap40
|
|
|
|
Post by rnagle on Jan 19, 2013 8:17:06 GMT -8
Thanks Rick, a bit of "creative metalworking" to fabricate mud flap hangers. K&S 1/32 square brass bar used, it was annealed to make it easier to wrap around into coil shape. Piece of 3/32" brass tube used to form coils, mounting bracket on frame is .060 x .060 styrene strip with .040 dia. hole drilled through - so in this case a square peg does fit in a round hole. 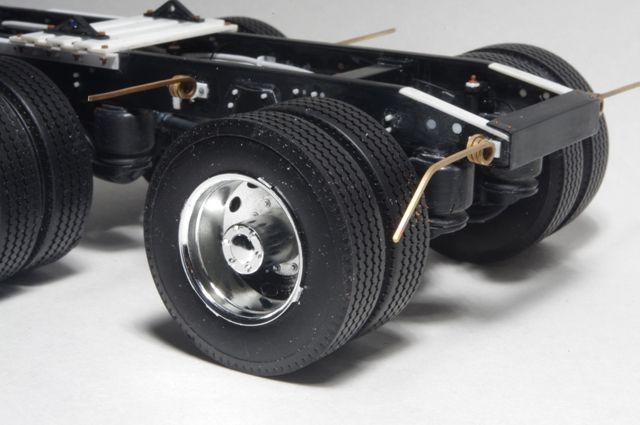 |
|
|
|
Post by boxer64 on Jan 19, 2013 12:27:07 GMT -8
This gonna be huge Robert  Great details on the chassis and wheels. I had one quiston, the airbrake tube on the frontwheel brakechamber, is it always gonna true the chassis? And where gonna end that tube on the other site. I will gonna use it on my Lonestar.  ;D (I hope you understand what I mean to say) Eddy |
|
|
|
Post by rnagle on Jan 19, 2013 20:52:57 GMT -8
Hi Eddy, I do understand your question about front air brake line, it does go through frame rail, here is a reference photo of real Pete 378. 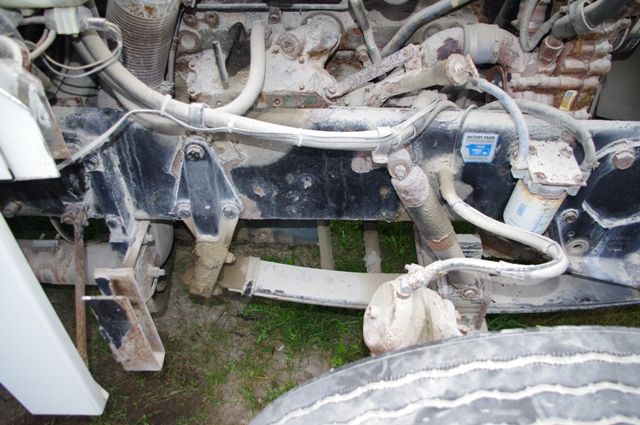 I don't have photo showing where line goes to, looking at a real truck at my work line from each front brake chamber goes to a brake valve mounted at front of frame under radiator, I modelled this with styrene strip. |
|
|
|
Post by slurrydog on Jan 20, 2013 5:47:02 GMT -8
I can not say enough about the detail work Rob. Looking really good.
Dave
|
|
|
|
Post by boxer64 on Jan 21, 2013 0:45:29 GMT -8
Hi Robert, Thanks for the answer and reference pic. It will help me further to build on the Lonestar.  Thanks, Eddy |
|
|
|
Post by rnagle on Jan 27, 2013 12:46:04 GMT -8
Frame's next stop is paint booth, some of the items here will be removed prior to blue paint such as pogo stick, walkway grating and crossbar for half fenders. Brass strip used for half fender rear supports to give them some strength. 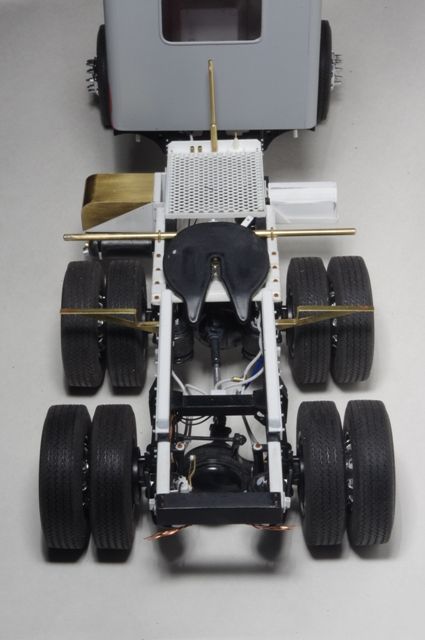 Fifth wheel ramps made up from styrene strip & angle. 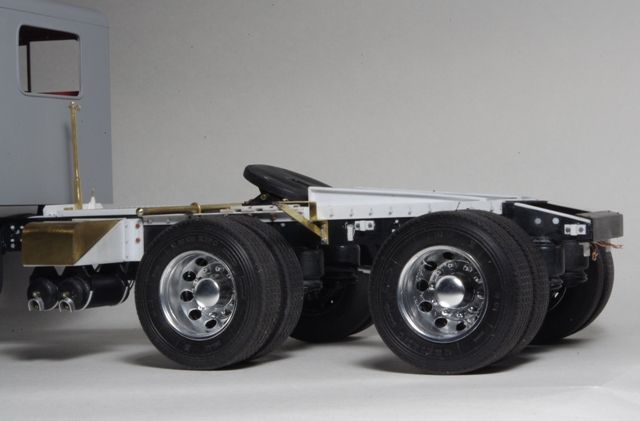 Front wheel, Alclad chrome with Tamiya clear orange for reflectors on lug nut covers. Wiring/hoses left extra long on frame for fitting to cab at final assembly. 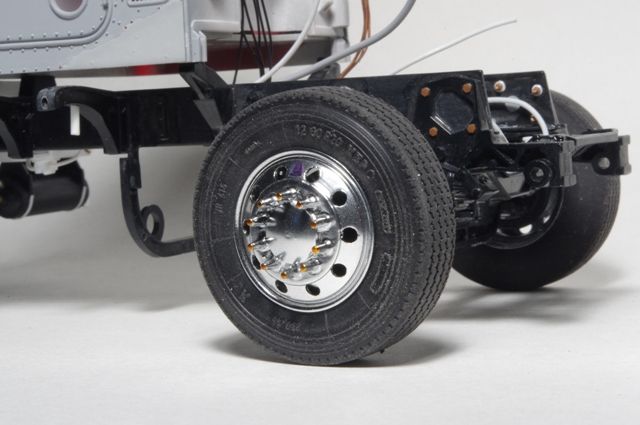 |
|
|
|
Post by ap40rocktruck on Jan 27, 2013 14:44:37 GMT -8
Excellent brass work! Any close ups on the 1/2 fender rear supports?
Ap40
|
|