|
|
Post by Robert Myers on Mar 10, 2013 10:19:42 GMT -8
That is awsome!!!!!
|
|
|
|
Post by rnagle on Mar 10, 2013 16:43:37 GMT -8
Thanks Robert! I had considered building new mirrors from brass wire, after looking at the kit parts realized they were fairly good and a couple small improvements could be easily made. Oversize tie-rod end appearance of braces was remedied by filing end down to look more like the flattened and drilled 1:1 end. Notches in mirror head where it attaches are covered with piece of .010 x .125 styrene strip, spot mirror is nicely molded but flat on mirror surface. Drop of epoxy gives it proper convex shape. 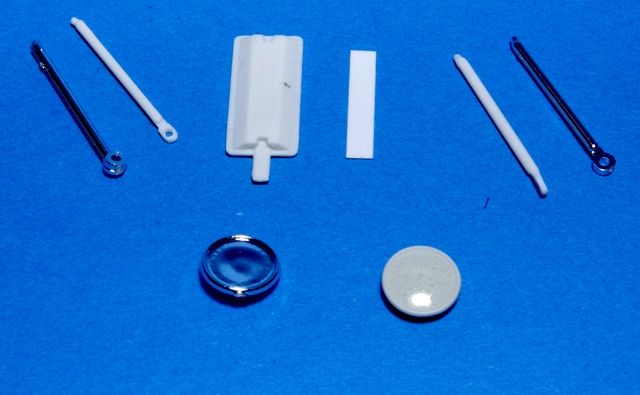 Mirrors set in place on cab, nut/bolt/washer castings added where braces and spot mirror attach. CB antenna bracket is .100 styrene angle with 1/32 x .006 brass tube. 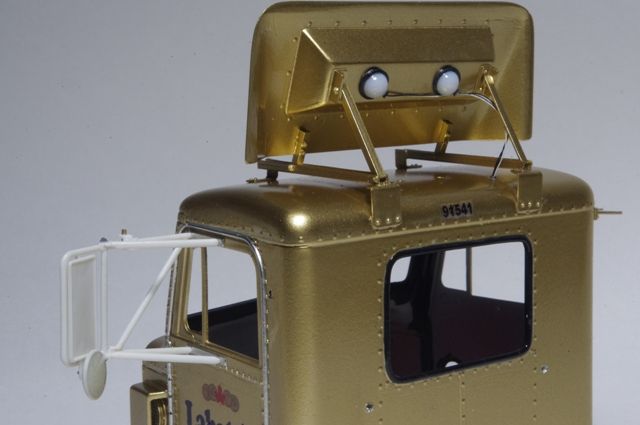 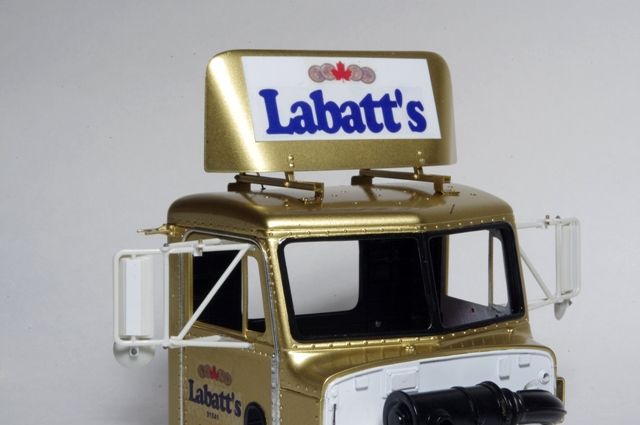 |
|
|
|
Post by 78kw on Mar 10, 2013 23:59:54 GMT -8
Nice.
Sent from my SPH-D710 using proboards
|
|
|
|
Post by jimb on Mar 11, 2013 9:05:52 GMT -8
Beautiful job.
I'm thirsty! ;D
|
|
|
|
Post by plowking on Mar 11, 2013 9:12:04 GMT -8
We need aftermarket mirrors that look that good!!
|
|
|
|
Post by rnagle on Mar 11, 2013 12:32:22 GMT -8
Thanks guys, best part about these mirrors is they are mostly kit parts. Dechroming and removal of parting lines makes a big difference, drop of epoxy was also easy to add on convex mirror face. Bare Metal Foil was used on raised mounting bracket detail molded into cab door.
|
|
|
|
Post by rnagle on Mar 15, 2013 17:07:25 GMT -8
Cab almost ready to install, exterior items in place and windows glazed. Just waiting on completion of a few interior parts now.  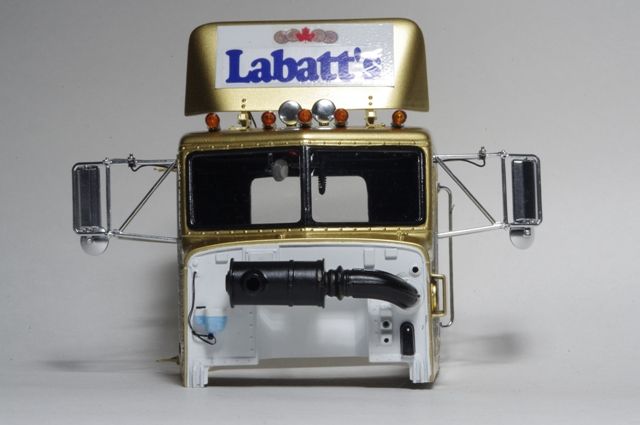 |
|
|
|
Post by rnagle on Mar 16, 2013 16:03:58 GMT -8
At last! A significant milestone: Cab now installed. Hood to fit & paint, also exhaust system to complete. 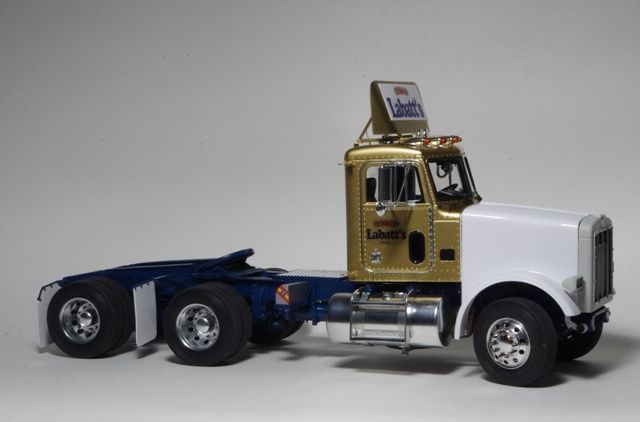 Reference material: 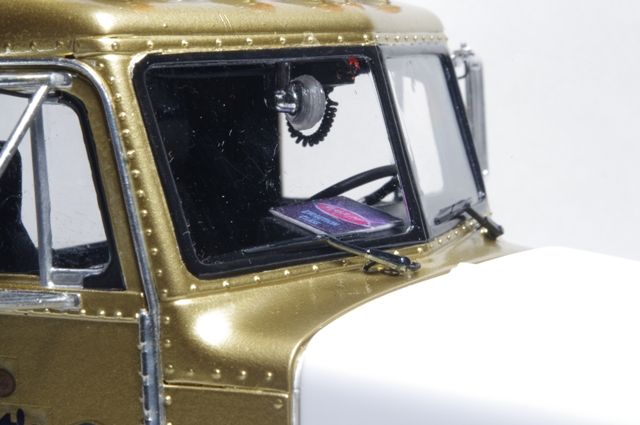 And a kit! Looks like someone bobtailed to the hobby store....... 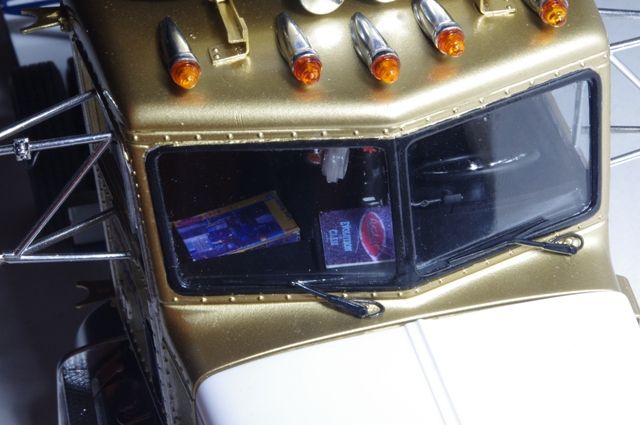 |
|
|
|
Post by rnagle on Mar 17, 2013 10:15:19 GMT -8
Brass tube, .005 shim and strip used for rain cap along with .010 x .040 styrene strip and .025 styrene rivets (Tichy Train Group detail part) 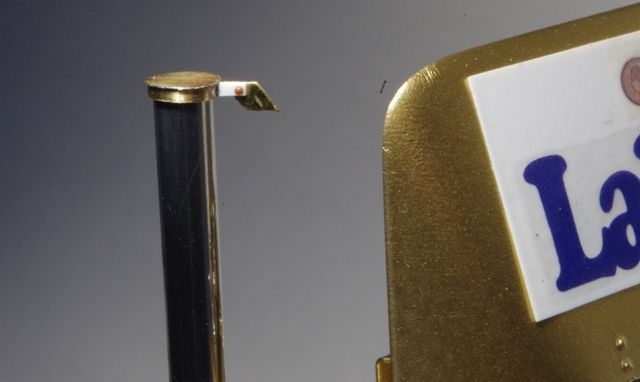 Kit muffler and grab handle used with Plano etched stainless "Peterbilt" style mesh wrap. Stack itself is K&S aluminum tube cut to length & polished. I drilled both ends of muffler and used one piece of tube right through. 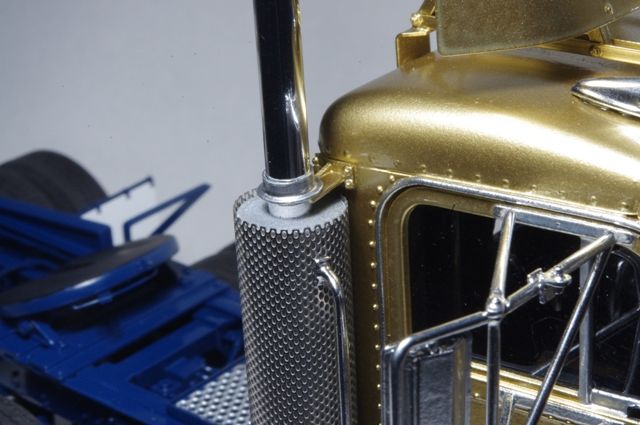 This is the easy part of stack, piping to engine is next.  |
|
|
|
Post by jimb on Mar 17, 2013 10:33:48 GMT -8
Nice!
|
|
|
|
Post by trailking120 on Mar 17, 2013 11:28:53 GMT -8
|
|
|
|
Post by rnagle on Mar 17, 2013 12:01:33 GMT -8
Thanks Justin, book & kit were easy to do. For both items photos were taken, then cropped so only the image remained. Box the size of desired object was drawn on CAD program. I just draw them 1:1 scale and convert sizes as required. Book cover is 12" x 9" which works out to .500" x .375" in 1/24 scale. Kit box was done in a similar manner with top, side and end flaps all together as if box was flattened out. "Draw: Picture" tool used to import jpeg images to drawing, because photos were cropped image fits perfectly into box. Completed drawing printed on white decal paper same as any other home made decal. Styrene sheet the required thickness (.020 for book, laminated to .170" for kit box) cut to size and decal applied. Black paint used on spine of "book", on kit box decal applied as one piece, side and end flaps folded down around styrene block. Made a few extras, here is a photo of the decals. 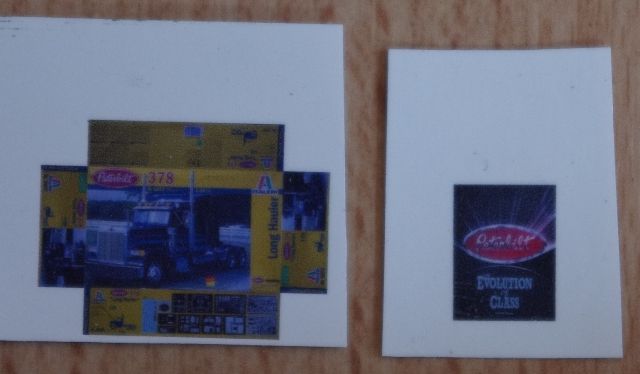 Just something fun to do that is a bit different. Can be a real "time machine" also, for example truck is a late 80's but "Peterbilt: The Evolution of Class" wasn't published until 2001! |
|
|
|
Post by rnagle on Mar 17, 2013 13:16:07 GMT -8
Disclaimer: This is NOT a rollover!  Exhaust pipes roughed in using pieces of kit pipe from the 378 and 377 "donor" along with a short piece of 5/32" styrene tube to extend straight run. Lots of clean up and finish work to do on the exhaust pipe assembly now. 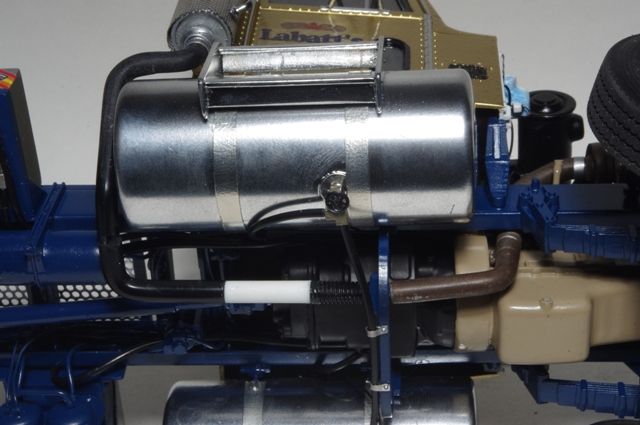 |
|
|
|
Post by trailking120 on Mar 17, 2013 14:34:25 GMT -8
Thanks Robert  |
|
|
|
Post by rnagle on Mar 17, 2013 17:30:09 GMT -8
Your welcome Justin.  Last round of creative activity this weekend (planets must have been aligned or something today, model didn't quite build itself but darn close!  ), bumper installed. Guides are 3/64" brass rod with 1/16" x .006 brass tube mounting brackets and light sockets. Light lenses are stretched amber sprue (multiple tries  ) 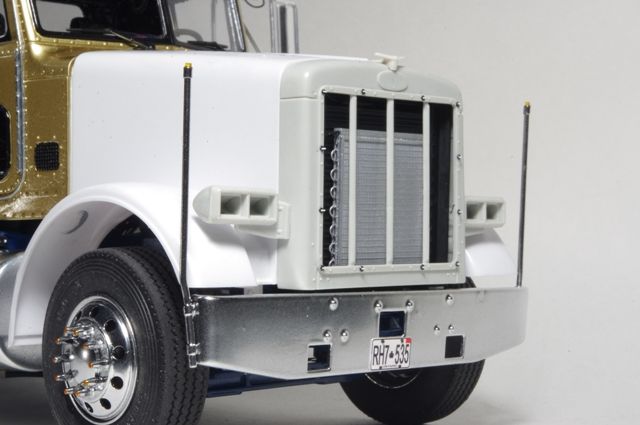 Exhaust pipe in place. This one was really frightening with regard to how easily it came together. 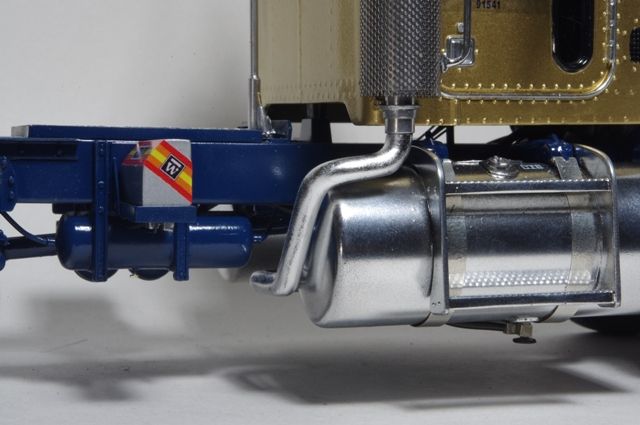 Rain cap & CB antennas in place. Cap was painted silver then given a couple coats of window tint (Pactra R/C paint) followed by Dullcote. Antennas are steel music wire painted white, red tips done by dipping in Testors dark red. I saw a how-to on painting prop tips in a book or magazine article a while back, same approach worked here to make both antenna tips same size. 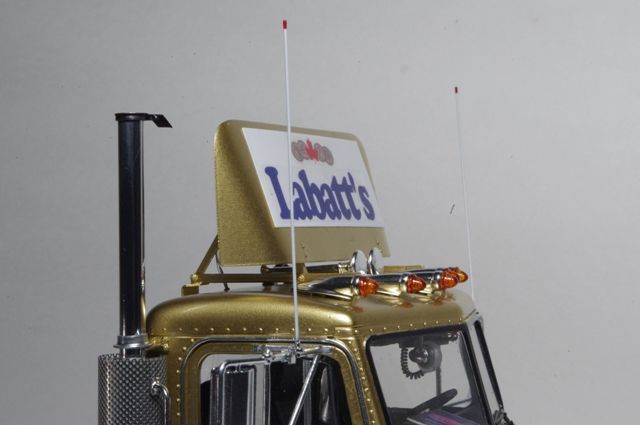 |
|