|
|
Post by rnagle on Oct 22, 2013 13:22:11 GMT -8
Thanks Dave, quarter fenders are kit parts from leftovers box with all cast on detail removed & new freestanding parts made from 3/32" styrene tube, .040 rod and fastener details from Tichy Train Group. .010 black styrene represents the rubber flap portion which seals against trailer. 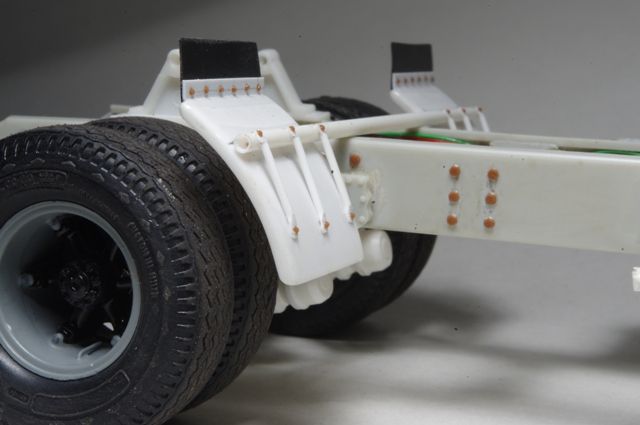 |
|
|
|
Post by gatorincebu on Oct 22, 2013 17:31:15 GMT -8
Robert,
That is looking really good. I guess I am going to have to order some of those resin rivets and stuff like that. They do seem to make a huge difference and add a lot to the over effect on the model.
Be Well
Gator
|
|
|
|
Post by ap40rocktruck on Oct 23, 2013 5:49:09 GMT -8
geese Rob for a little Ford, she is getting loaded up nicely with super details.
Ap40
|
|
|
|
Post by rnagle on Oct 24, 2013 14:17:04 GMT -8
Thanks guys, even them plain 'ol little Fords deserve some extra detailing!  |
|
|
|
Post by flattop on Oct 25, 2013 17:39:19 GMT -8
Very nice, top shelf as usual.
|
|
|
|
Post by rnagle on Oct 29, 2013 13:07:42 GMT -8
One of the areas where this kit's heritage shows is the lack of hood hinges. These were made with section cut from 3/16" styrene tube for bumper portion, regular 1/16" brass tube soldered to bent 1/64" x 1/8" flat bar for hinge itself. Cab and hood were taped in place with shims as needed to set everything level then styrene angle glued to hood to provide attachment surface for brass hinge. Pins are .020 brass wire, temporary ones for now. Once hood is in place permanently a bolt head casting will be attached to bumper portion of hinge. 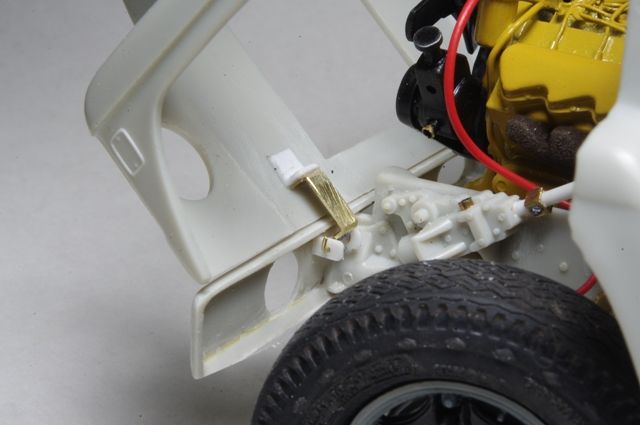 |
|
|
|
Post by gatorincebu on Nov 1, 2013 8:30:55 GMT -8
Robert,
Nice looking hinge detail!Having that hood tilt is a good modification and improvement to the overall model.
Be Well
Gator
|
|
|
|
Post by rnagle on Nov 2, 2013 13:00:33 GMT -8
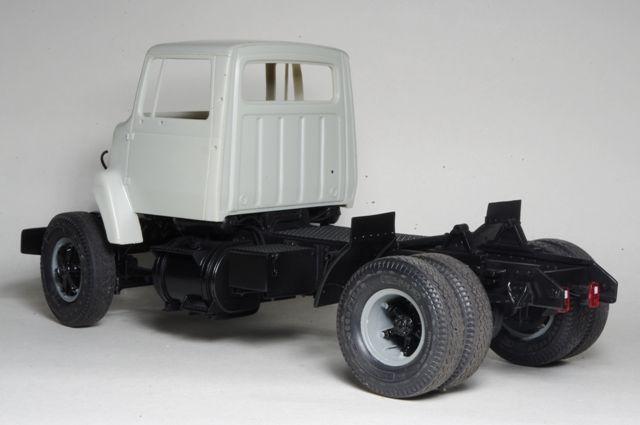 Thanks Gator! I admit painting isn't my #1 favourite modelling activity however it is certainly an important one. Model Master semigloss black was thinned approx. 70/30 with lacquer thinner for airbrushing. Fifth wheel left off at this stage for easier access to get paint in all the little spots around differential area. 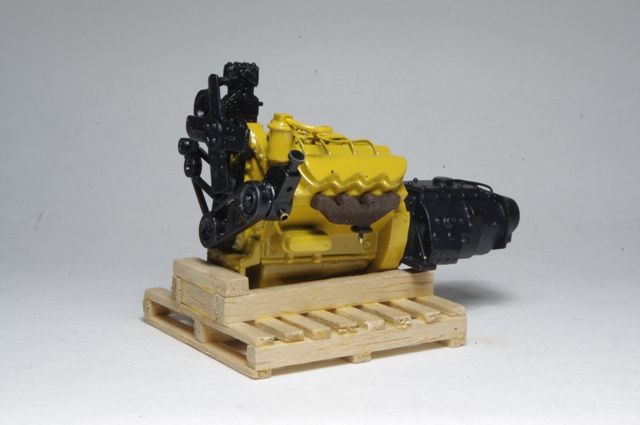 Engine is kit item with parts box manual transmission added, basic plumbing and painted "Clatterpuller" yellow. Still needs filters, alternator and some more wiring before final assembly into frame. |
|
|
|
Post by rnagle on Nov 9, 2013 15:14:16 GMT -8
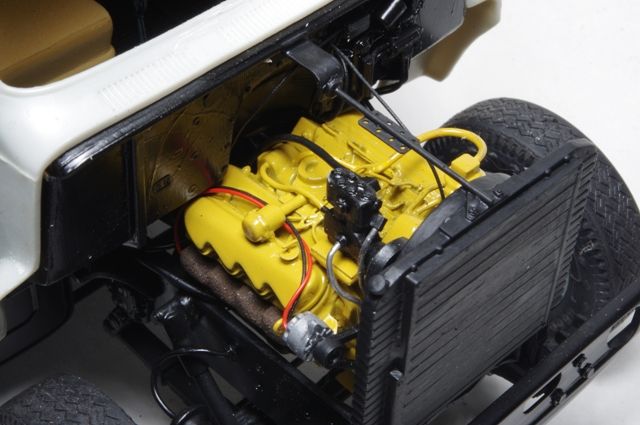 Engine "officially" installed now. Rad in place, brace has been added from top of rad back to firewall. 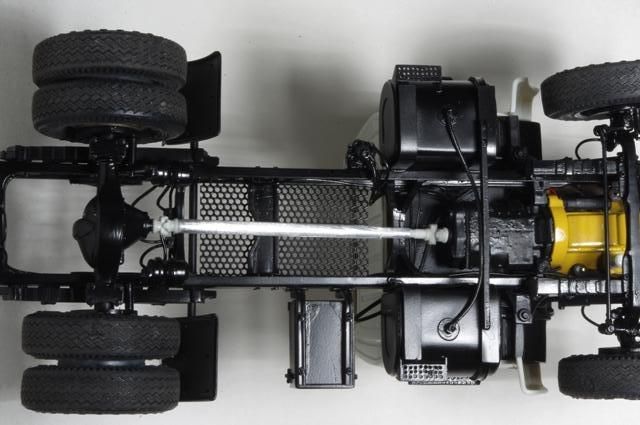 Down below, kit driveshaft ends were used with aluminum tube for driveshaft. No parting lines to clean up and by telescoping tubes together driveshaft is easy to install. Model Master semigloss black was used, partway between flat and gloss it looks a good match for what 1:1 truck frames are painted at the factory. |
|
|
|
Post by gatorincebu on Nov 10, 2013 5:16:05 GMT -8
Looking really nice there Robert!
Be Well
Gator
|
|
|
|
Post by plastictrucker on Nov 10, 2013 6:57:06 GMT -8
Robert you've done it again Cant wait to see it in person. Looking really nice there Robert! Be Well Gator Gator,glad to hear you didn't get blown away |
|
|
|
Post by trailking120 on Nov 10, 2013 14:42:12 GMT -8
Dame Rob there is some incredible detail on the little Ford.  |
|
|
|
Post by rnagle on Nov 14, 2013 19:19:24 GMT -8
Thanks guys - plain 'ol fleet trucks deserve extra detail work too! Bit of an afterthought here, went back and added splash guards to cab using a couple reference photos for guide. Styrene sheet & strip used throughout, the black .010 sheet works well for rubber curtain portion. 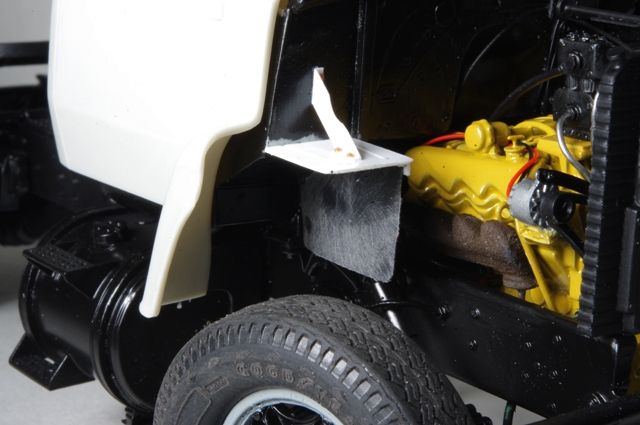 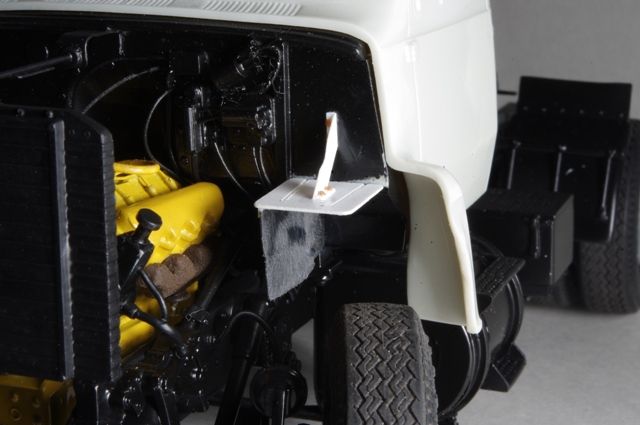 |
|
|
|
Post by ap40rocktruck on Nov 14, 2013 19:41:33 GMT -8
you really should give the whole truck a light dust type weathering, it will bring out all of the stunning detail you have put into the build.
Ap40
|
|
|
|
Post by trailking120 on Nov 15, 2013 11:19:56 GMT -8
Lost for words awesome came to mind again. Great work Rob  |
|